In the evolving landscape of embedded development, Command-Line Interface (CLI) tools are becoming essential for automation, Continuous Integration (CI), and lightweight GCC-based IDE setups (like VS Code or Eclipse).
pyOCD is an open-source Python-based debugging tool that offers excellent flexibility. When paired with the Geehy-Link debugger (which supports CMSIS-DAP V2), it provides a high-speed, reliable solution for programming and debugging APM32 and G32 series chips.
Currently, Geehy products cannot be installed directly via the standard pyOCD pack install command.
However, developers can enable full support using one of the two methods described below. Additionally, we will cover how to use a custom pyOCD & OpenOCD version for Geehy chips.
Using pyOCD
Why pyOCD?
- CLI Friendly: Perfect for scripting and automation.
- Performance: Fully utilizes the speed of Geehy-Link (CMSIS-DAP V2).
- Rich Commands: extensive support for registers, reset control, erasing, and flashing.
- IDE Ready: Prepares the ground for GCC-based debugging in Eclipse and VS Code.
Method A: Direct Use of CMSIS-Pack (Recommended for Quick Start)
If you have the Geehy SDK or the specific .pack file, you can load it directly without modifying the pyOCD source code.
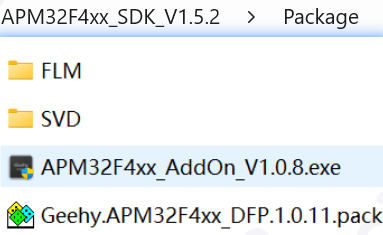
You can filter for “Pack” in https://global.geehy.com/design/software to get the “.pack” file.

You can get the “.pack” CMSIS-Pack file, “.FLM” Flash Algorithm, “.svd” scattered file from Geehy SDK.
1. Identify the Chip Name
First, you must find the exact “Device Name” defined inside the CMSIS Pack.
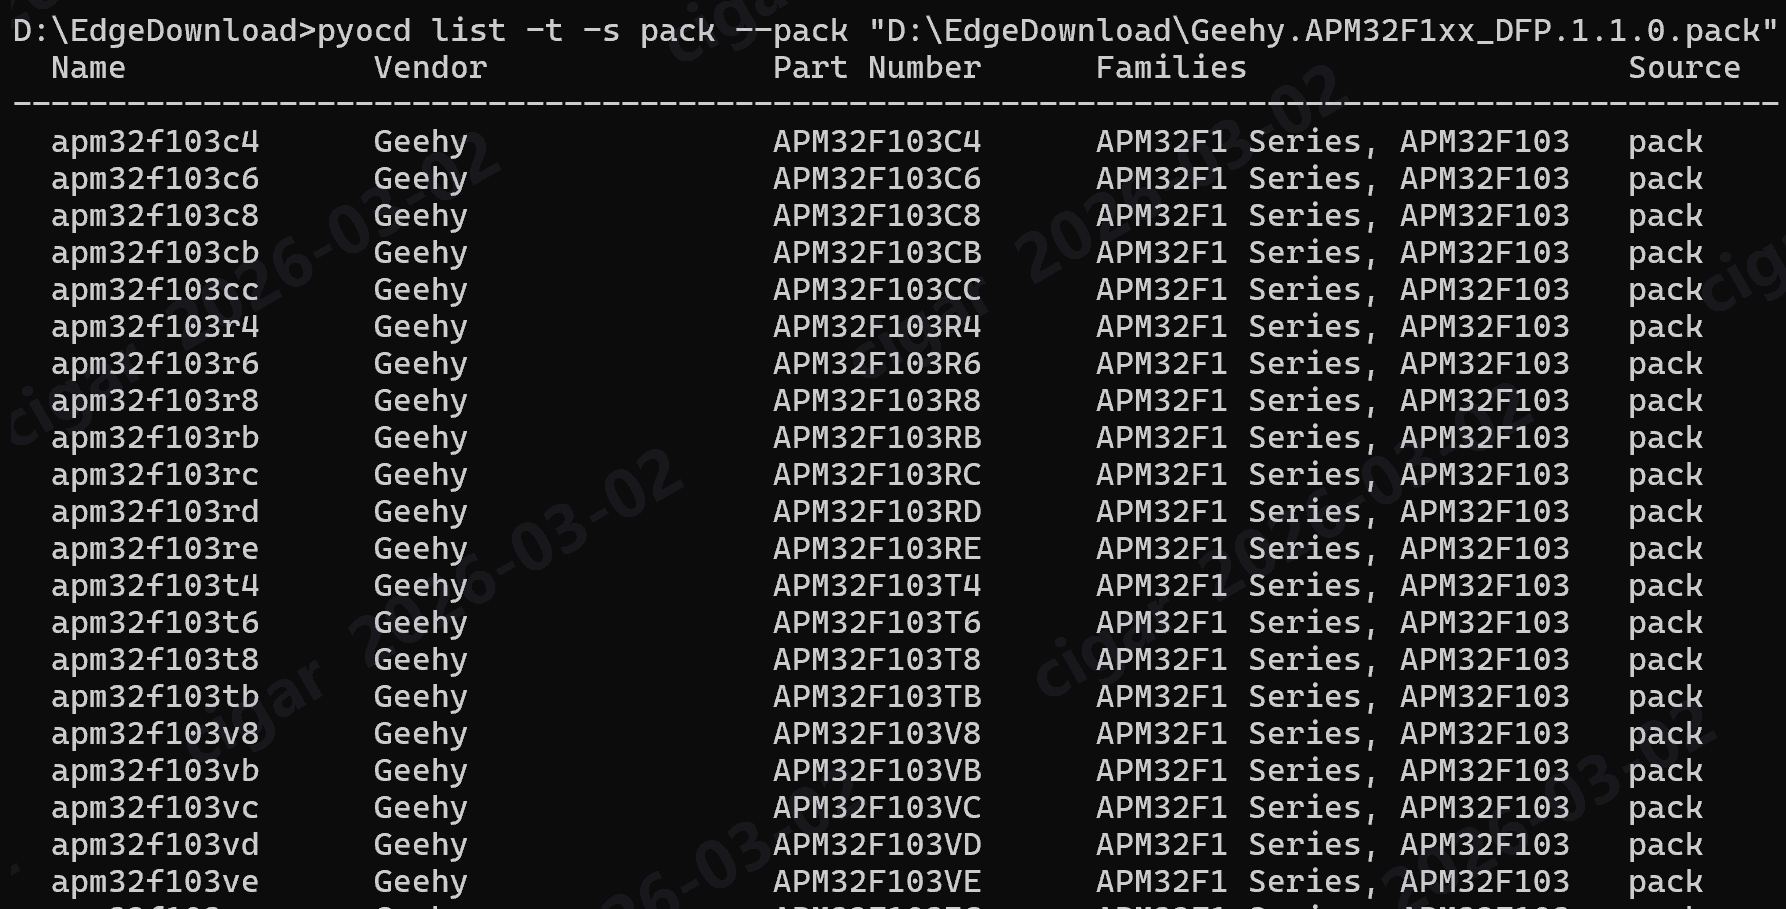
Run the following command to list devices within a specific pack:
# Syntax: pyocd list -t -s pack --pack <Path_To_Your_Pack_File>
pyocd list -t -s pack --pack "D:\Geehy_SDK\Package\Geehy.APM32E1xx_DFP.1.0.3.pack"
Output: The terminal will list available targets (e.g., APM32E103ZE, APM32E103VC). Note down the specific name you need.
2. Flash the Firmware
Once you have the target name, use the flash command.
Key Arguments:
-f <frequency>: Debug clock frequency in Hz (e.g., 4000000 for 4MHz).-t <target>: The device name found in Step 1.--pack <path>: The absolute path to your .pack file.-a <address>: Required only for .bin files to specify the start address.
Scenario 1: Flashing Hex/Elf Files
Hex and Elf files contain address information, so no address argument is needed.
pyocd flash --pack "D:\Geehy_SDK\Package\Geehy.APM32E1xx_DFP.1.0.3.pack" -t APM32E103ZE -f 4000000 project.hex

Scenario 2: Flashing Binary (.bin) Files
For raw binary files, you must specify the Flash start address (usually 0x08000000).
pyocd flash --pack "D:\Geehy_SDK\Package\Geehy.APM32E1xx_DFP.1.0.3.pack" -t APM32E103ZE -f 4000000 -a 0x08000000 project.bin
—
Method B: Manual Flash Algorithm Integration (Advanced)
This method extracts the flash algorithm from the SDK and embeds it into pyOCD. This is useful for creating a standalone Python environment that doesn’t rely on external Pack files. We will use the APM32F103 as an example.
1. Preparation
Install Python 3.7+ and pyOCD:
pip install pyocd
Get the .FLM File:
Extract the Geehy.xxxxxxxx_DFP.x.x.x.pack file from the Geehy SDK. Locate the xxxxxx.FLM file.
Get the Conversion Script:
Download generate_flash_algo.py from the pyOCD GitHub repository (located in the scripts/ folder).
2. Generate the Python Algorithm, i.e., APM32F103xB
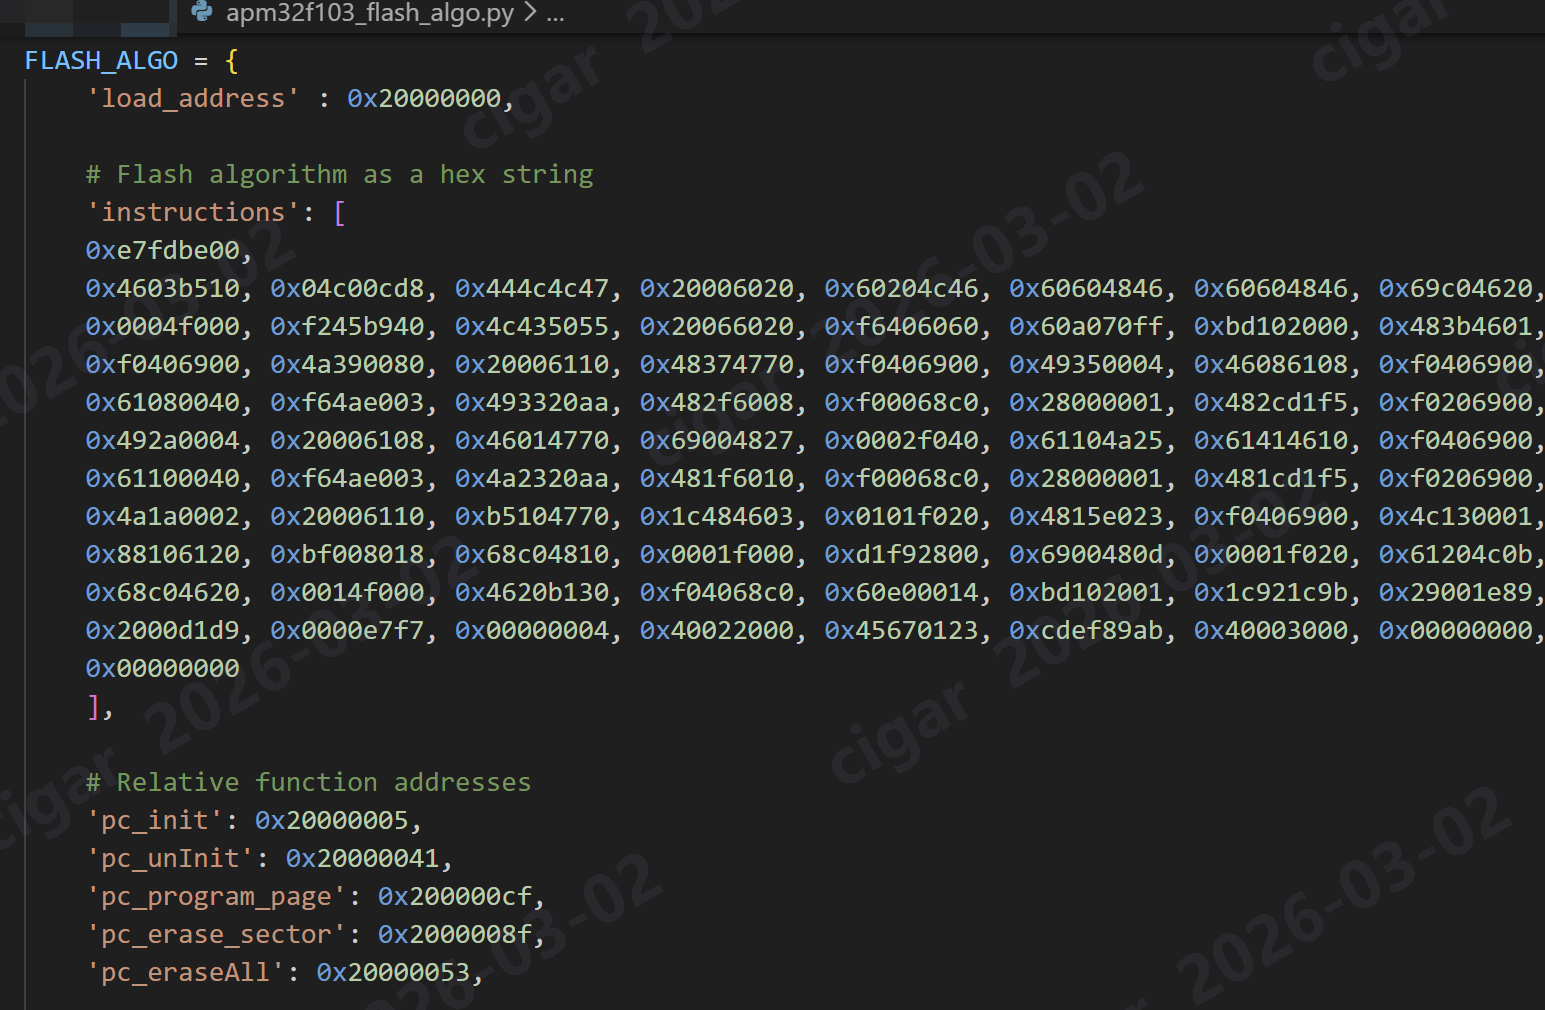
Run the script to convert the .FLM file into a Python dictionary.

python generate_flash_algo.py -o apm32f103_flash_algo.py APM32F10x_128.FLM
3. Create the Target File
Go to your pyOCD installation directory (e.g., .../site-packages/pyocd/target/builtin). Create a new file named target_APM32F103xB.py.
Copy the entire FLASH_ALGO dictionary from the generated file and define the class:
from ...coresight.coresight_target import CoreSightTarget
from ...core.memory_map import (FlashRegion, RamRegion, MemoryMap)
# Paste the generated FLASH_ALGO dictionary here
FLASH_ALGO = {
'load_address': 0x20000000,
# ... (instructions data) ...
}
class APM32F103xB(CoreSightTarget):
VENDOR = "Geehy"
MEMORY_MAP = MemoryMap(
FlashRegion(
start=0x08000000,
length=0x20000, # 128KB
blocksize=0x400,
is_boot_memory=True,
algo=FLASH_ALGO
),
RamRegion(
start=0x20000000,
length=0x8000 # 32KB
)
)
def __init__(self, session):
super(APM32F103xB, self).__init__(session, self.MEMORY_MAP)
4. Register the Target
Edit the __init__.py file in the same directory (pyocd/target/builtin/) to register the new chip:
from . import target_APM32F103xB
BUILTIN_TARGETS = {
# ... other targets ...
"apm32f103xb": target_APM32F103xB.APM32F103xB,
}


5. Verify and Test
You can now use the chip name directly without referencing a pack file.
- Check List:
pyocd list --targets (Look for apm32f103xb)

- Erase Chip:
pyocd erase --chip -t apm32f103xb
- Flash Firmware:
pyocd flash -t apm32f103xb firmware.hex
—
Using OpenOCD
For developers who prefer OpenOCD, Geehy provides a customized version that includes configuration files for APM32/G32 chips.
1. Download OpenOCD for Geehy
Please download the Geehy-customized OpenOCD package from the provided resource below.
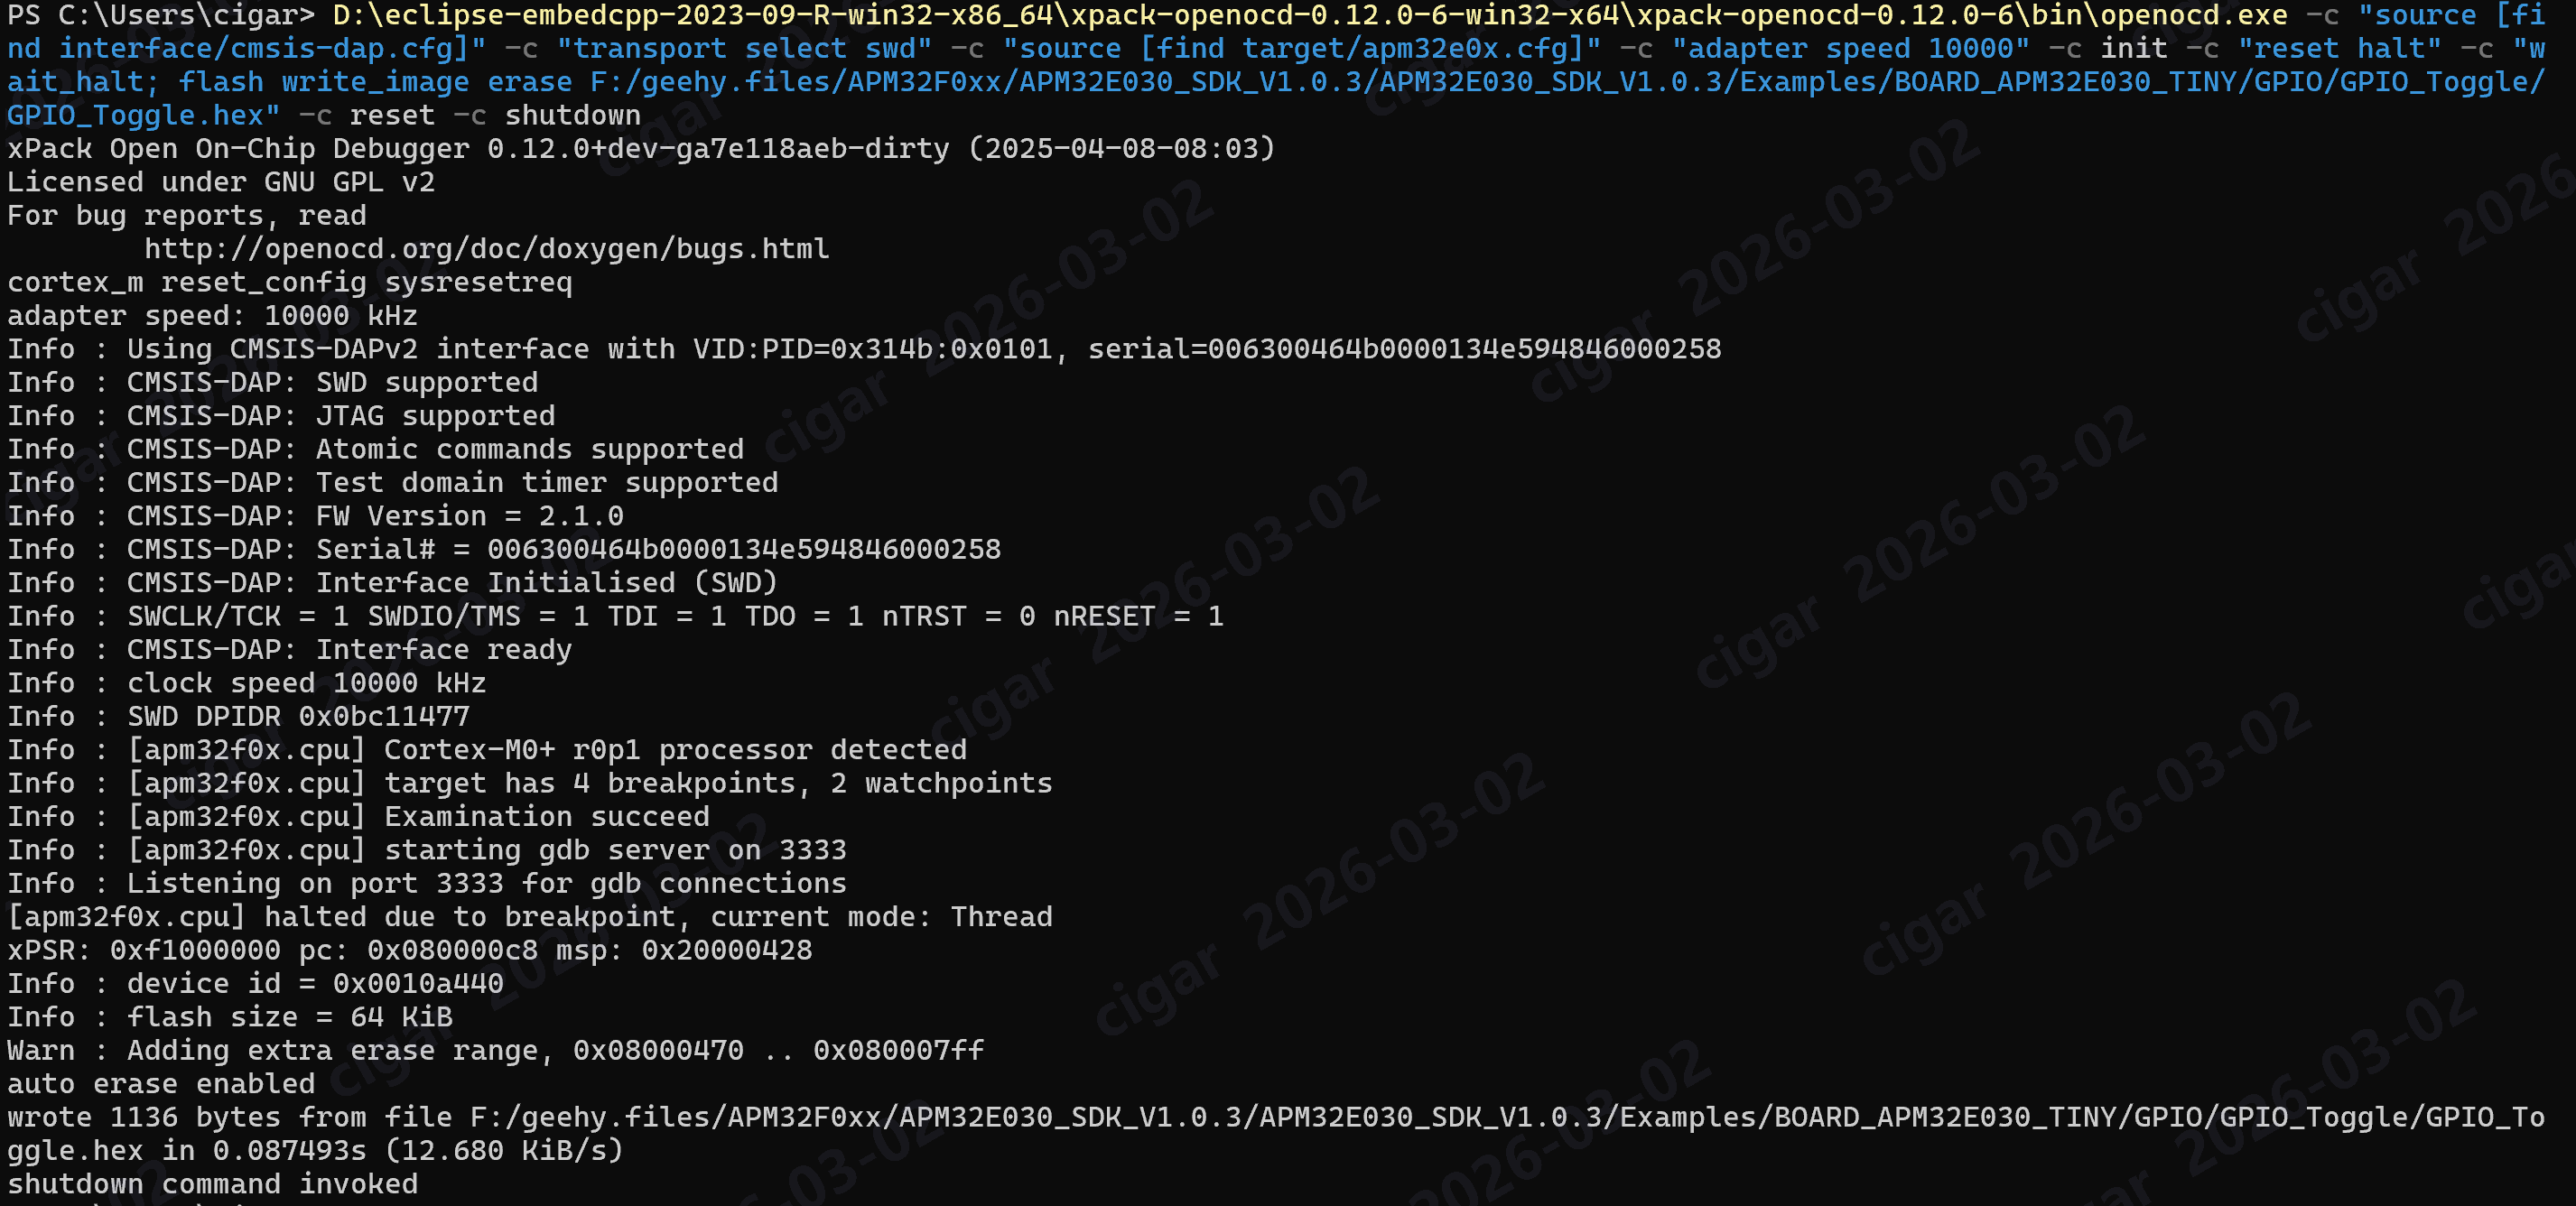
2. Flashing Command
Once installed, you can use the command line to download .hex files. Ensure you point to the correct interface and target configuration files included in the package.
openocd -c "source [find interface/cmsis-dap.cfg]" \
-c "transport select swd" \
-c "source [find target/apm32e0x.cfg]" \
-c "adapter speed 10000" \
-c init \
-c "reset halt" \
-c "wait_halt; flash write_image erase path/to/your_firmware.hex" \
-c reset \
-c shutdown
-f interface/cmsis-dap.cfg: Specifies the debugger interface (Geehy-Link uses CMSIS-DAP).-f target/apm32fxxx.cfg: Specifies the target chip configuration (Select the .cfg file matching your specific chip model from the target folder).-c "...": Executes the programming sequence:
program <file>: Writes the file to flash.verify: Checks if the write was successful.reset: Resets the chip after programming.exit: Closes OpenOCD.