The G32F031 by Geehy is a powerful Cortex-M0+ general-purpose microcontroller integrating hardware divider, COMP and OPA.
While Keil and IAR are standard industry tools, many developers prefer the flexibility and cost-effectiveness of Eclipse combined with GCC.
This guide walks you through the structure of the G32F031_DAL_SDK, setting up a free open-source toolchain, and configuring Eclipse for building and debugging using pyOCD.
1. Exploring the G32F031_DAL_SDK
Before diving into the tools, let’s understand what is provided in the SDK. The folder structure is designed to give you full control over the hardware:
- Libraries: This contains the Device Driver Library (DDL).
The .c files handle module initialization, configuration, and DMA settings.
The DDL uses ASSERT_PARAM to validate validity, jumping to static inline execution in .h files for efficiency.
You will also find ARM/IAR/GCC standard chip description files and pre-installed ARM CMSIS core files here.
- Utilities: Contains essential tools for debugging:
- FLM: Flash programming algorithms.
- SVD: System View Description files for register definitions.
- pyOCD Support: Python scripts to enable G32F031 support in pyOCD.
- Package: CMSIS-PACK files (
.pack) that can be installed directly into Keil MDK via double-click.
- Boards: Contains Board Support Packages (BSP) for the G32F031_EVB, including configuration code for COM Ports, LEDs, and Keys.
- Examples_DDL: A massive collection of reference projects (24 modules, nearly 50 applications).
- Source: Contains
main.c, interrupt configurations, and system settings.
- Config: Peripheral-specific configurations.
- Project: Ready-to-use projects for MDK (Keil), IAR, and Eclipse.
2. Setting Up the Environment
To use Eclipse effectively, you need to download and install the following tools:
- IDE: Eclipse Embedded C/C++ (eclipse-embedcpp).
- Compiler: GCC 13.2.1 (specifically
xpack-arm-none-eabi-gcc-13.2.1-1.1).
- Build Tools: xpack-windows-build-tools-4.3.0-1 (provides
make).
- Python: Python 3.14 (Required for pyOCD).
Installing and Configuring pyOCD
pyOCD is recommended for G32F031. J-Link and OpenOCD support will be fulfilled shortly.
- Install pyOCD via pip:
pip install pyocd.
- Integrate the G32F031 Target:
- Locate the
Utilities/pyOCD/target_G32F031.py file in the Geehy SDK.
- Copy it to your pyOCD installation directory:
.../site-packages/pyocd/target/builtin.
- Open
__init__.py in that same builtin folder and add the following two edits:
- Verification: Open
cmd.exe and run:
pyocd list --targets
Ensure G32F031x8 appears in the list as “builtin”.

From now, you can erase and program G32F031 on your PowerShell Terminal or cmd.exe.

Configuring Paths in Eclipse
You can add the /bin directories of GCC and Build Tools to your Windows System PATH.

Alternatively, configure them inside Eclipse:
- Go to Window -> Preferences.
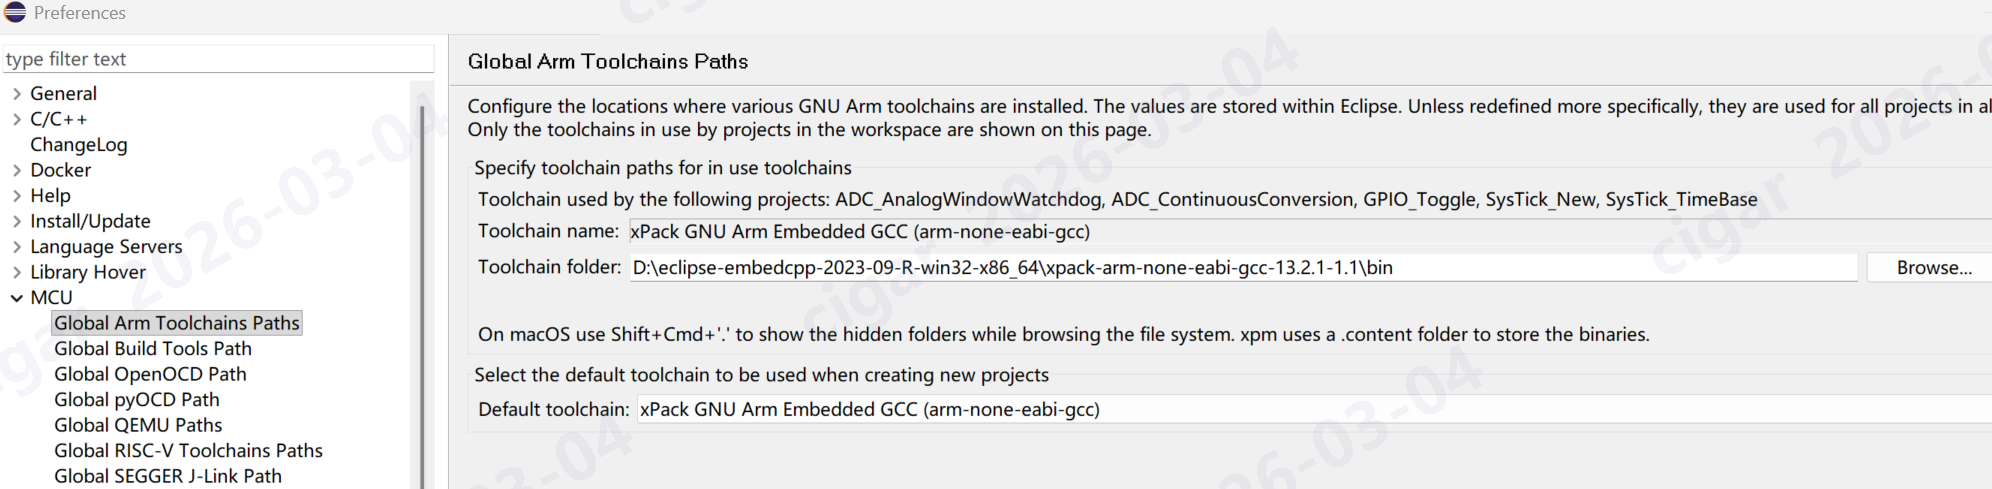
- Navigate to MCU -> Global Arm Toolchains Paths and MCU -> Global Build Tools Path.
- Set the MCU -> Global pyOCD path.
3. Hardware Connection
We will use the G32F031_EVB, which features an integrated CMSIS-DAP V2 debugger and a virtual COM port for logging.
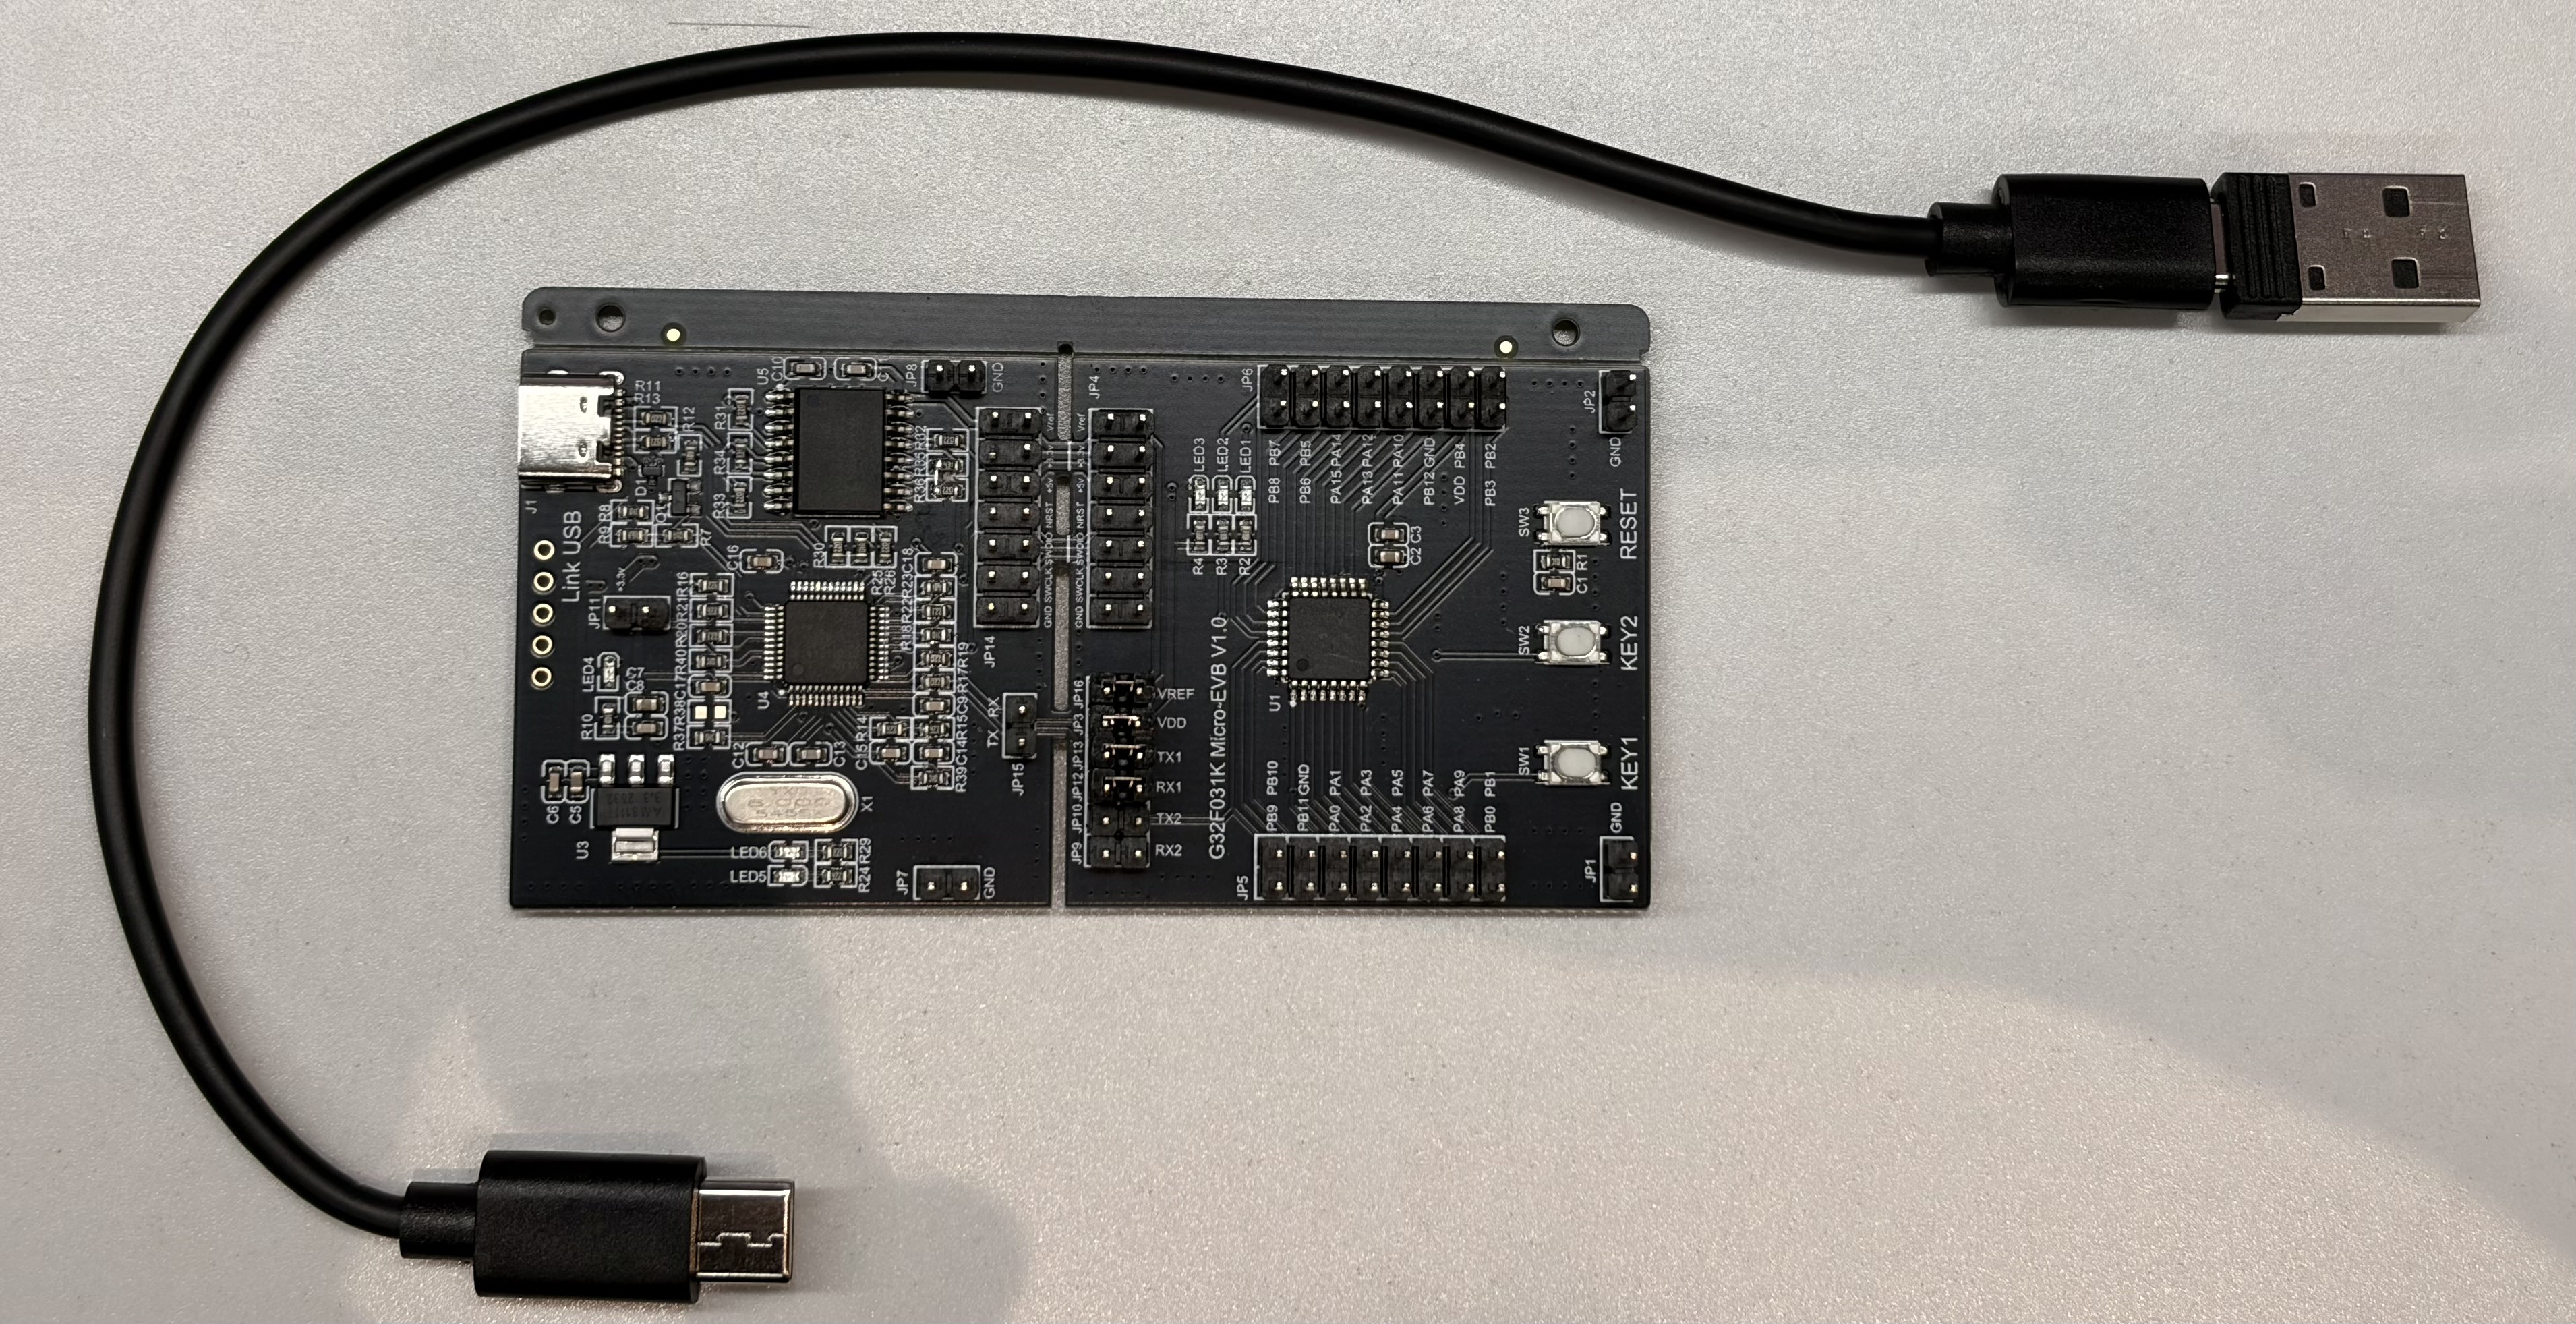
Important Power Note: The EVB debugger does not support USB Type-C PD handshaking.
- Use a USB Type-A to Type-C cable.
- Plug the Type-A end into the PC and the Type-C end into the EVB.
- Success Indicator: LEDs on both sub-boards of the EVB should light up.
4. Building Your First Project
Let’s import the SysTick example, which uses the ARM kernel timer to toggle an LED.
- Open Eclipse and go to File -> Open Projects from File System….
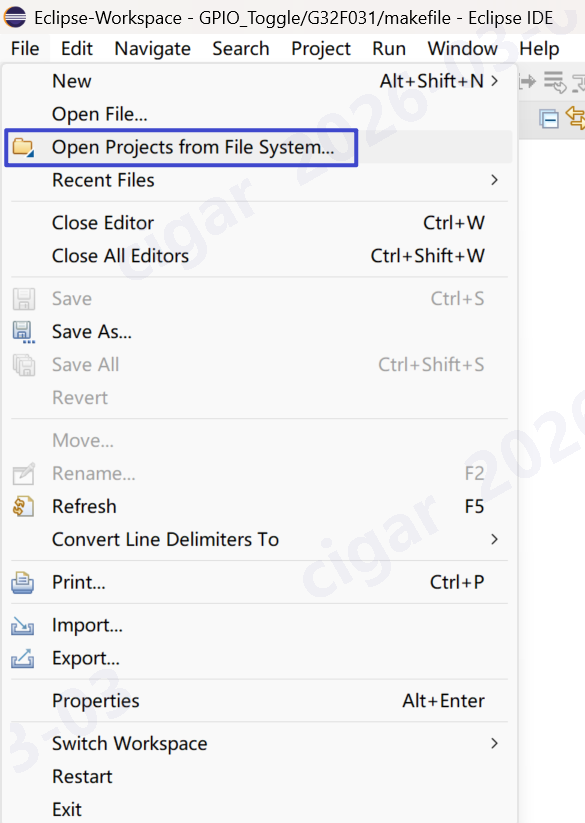
- Select the
Project/Eclipse folder inside the SysTick example directory.

- Note: In a workspace, project names must be unique.
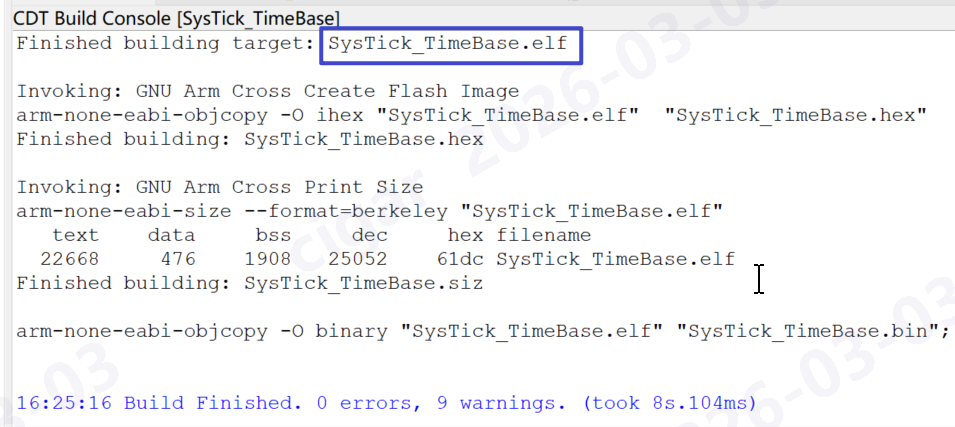
- Once imported, right-click the project in Project Explorer and select Build Project.

- If configured correctly, this will generate
.elf, .hex, and .bin files. You are now ready for production or debugging.
5. Debugging with Eclipse & pyOCD
To move from compilation to real-time simulation:
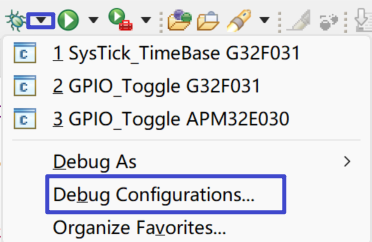
Click the arrow next to the Green Bug icon and select Debug Configurations.
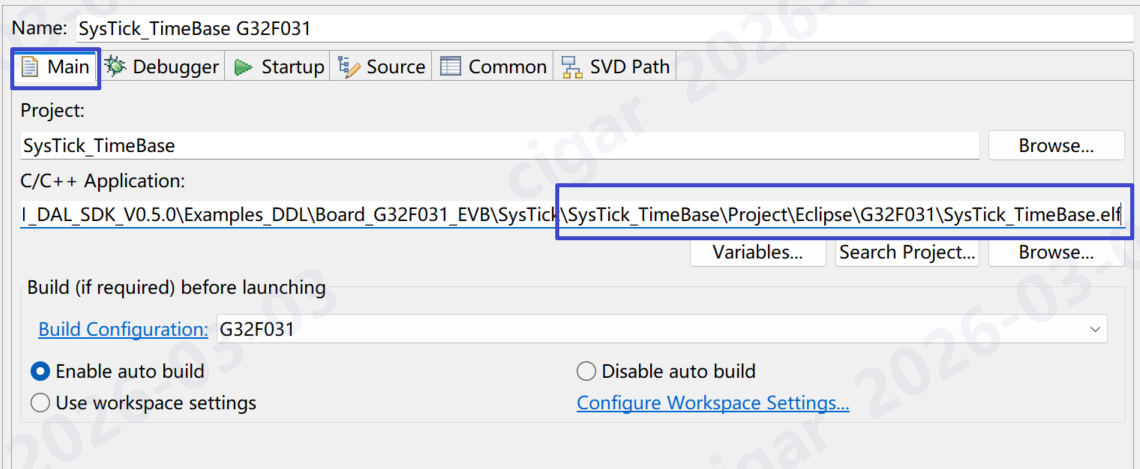
Double-click GDB PyOCD Debugging to create a new instance (e.g., for SysTick).
Main Tab: Browse and select the .elf file you just built.
Debugger Tab:
- Debug Probe: Select “Geehy CMSIS-DAP”.
- Target Selection:
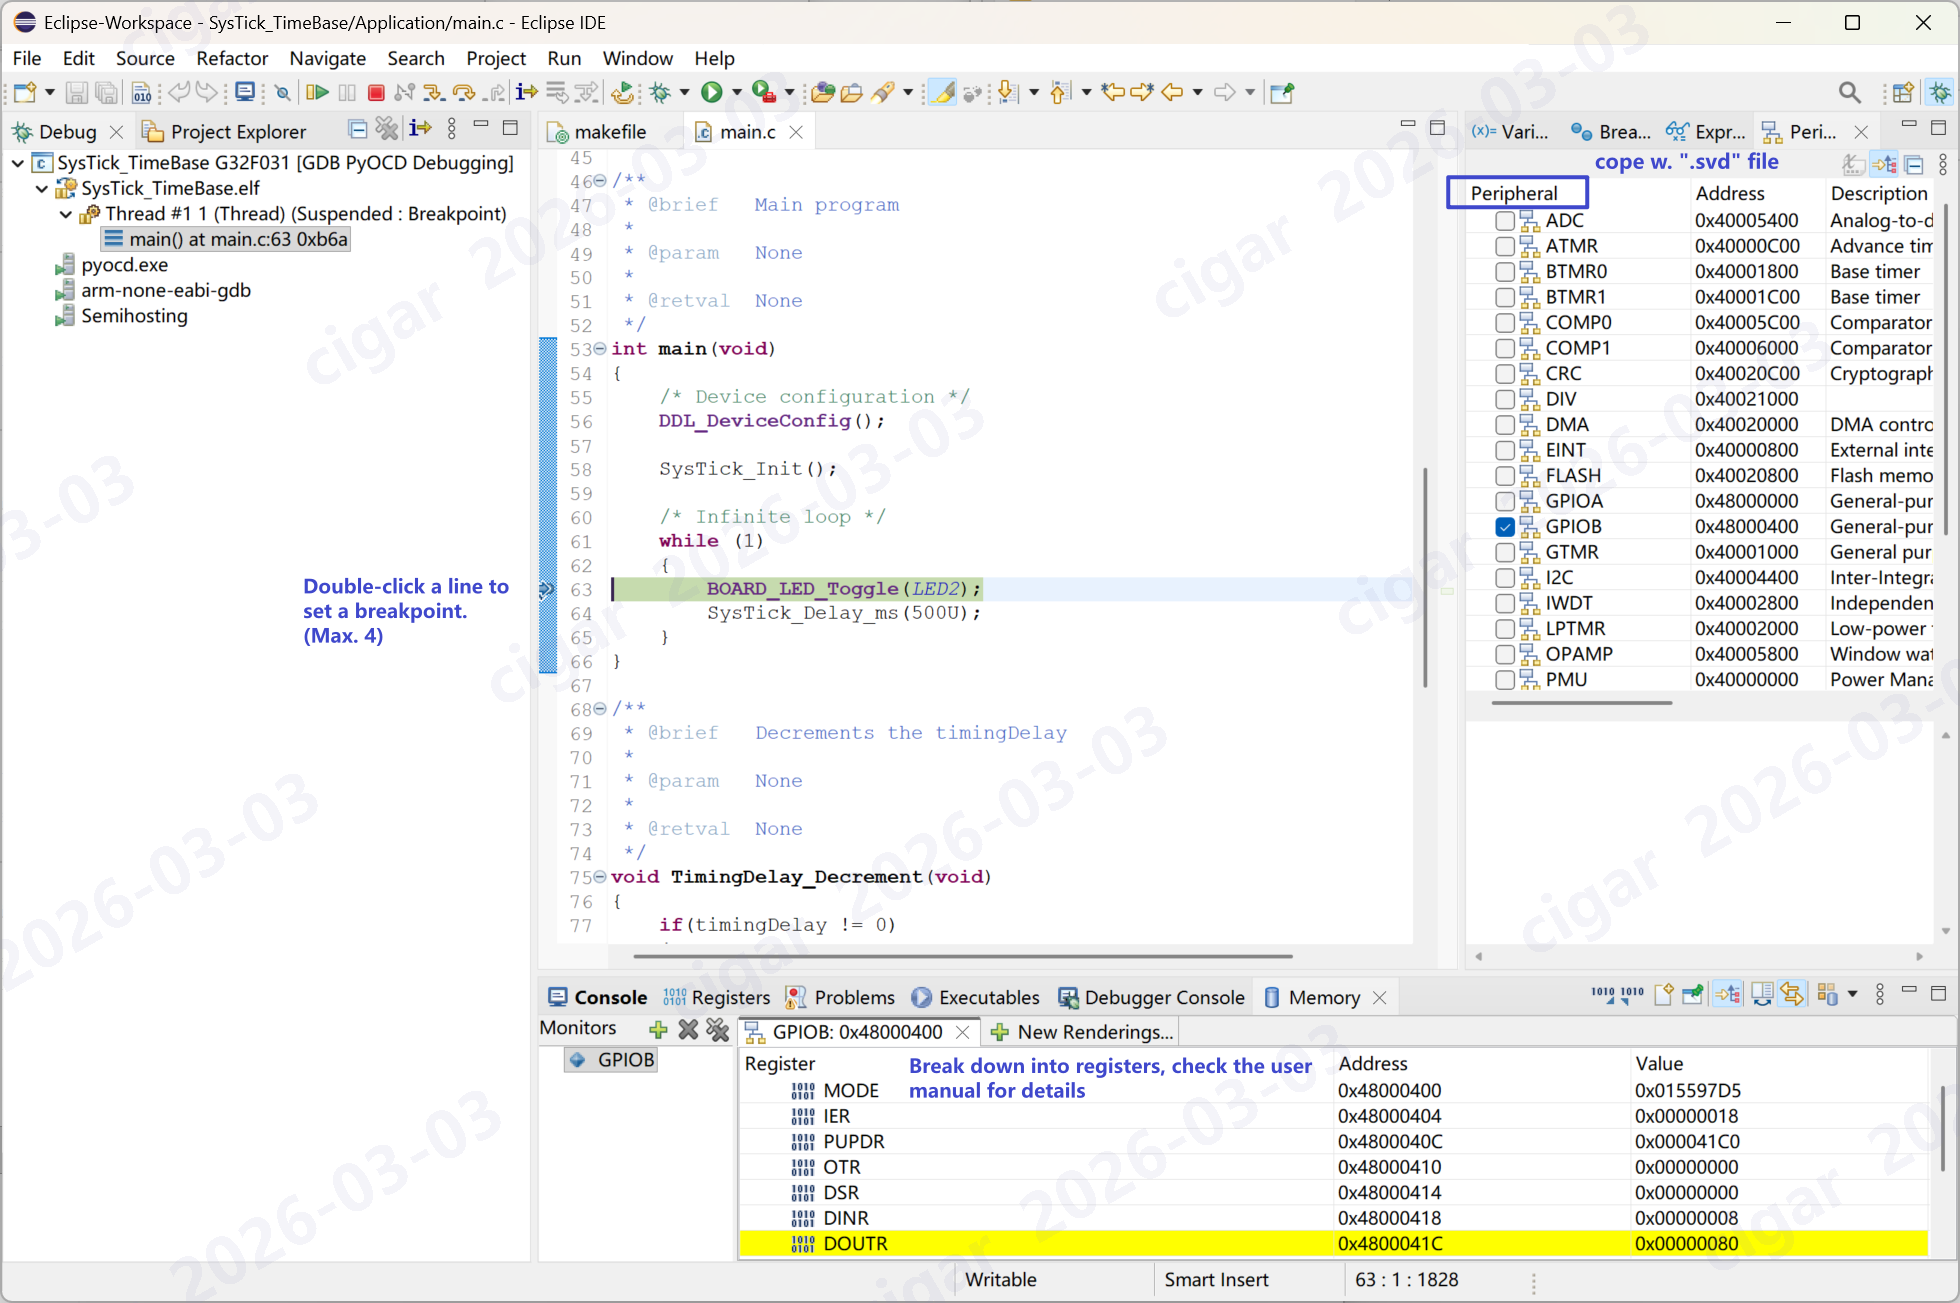
SVD Path: Point this to the .svd file in the SDK Utilities folder. This allows you to view peripheral register values during debugging.

Click Debug. You should now be able to step through code and control the LED.
6. Pro Tips & Troubleshooting
Creating New Projects: If you want to start from scratch, refer to Geehy Application Note AN1093.
Renaming Projects: If you rename a project, compilation may fail due to broken include paths.
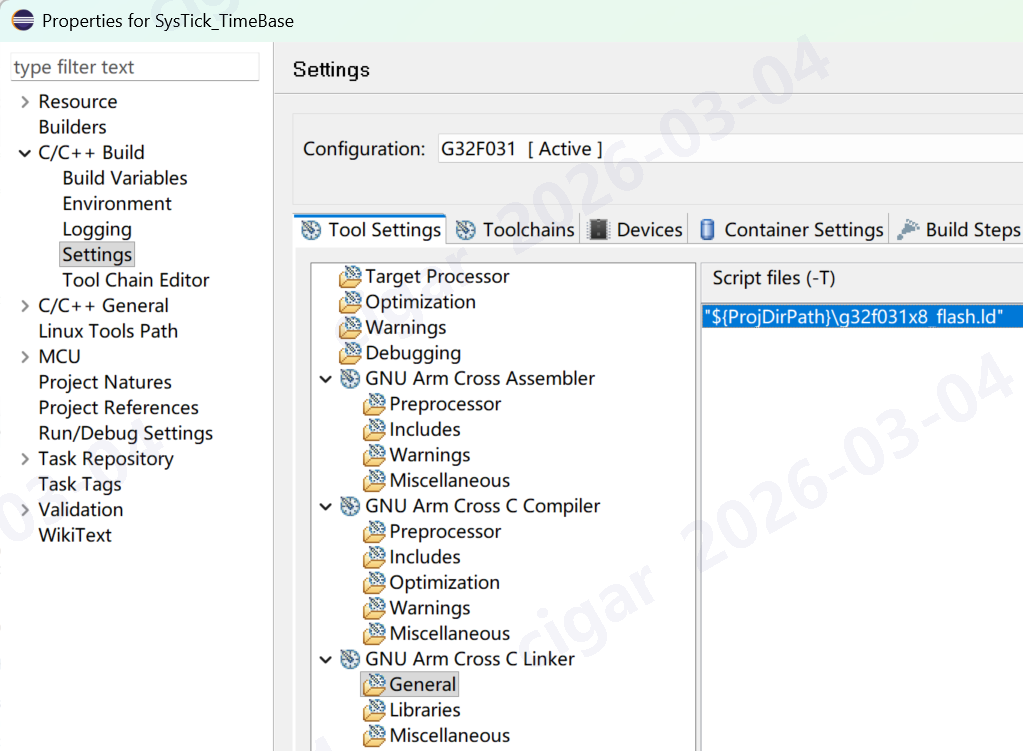
Check Properties -> C/C++ Build -> Settings -> Tool Settings -> GNU Arm Cross C Compiler. Restore paths to match the original example. You can manage more settings from this page.

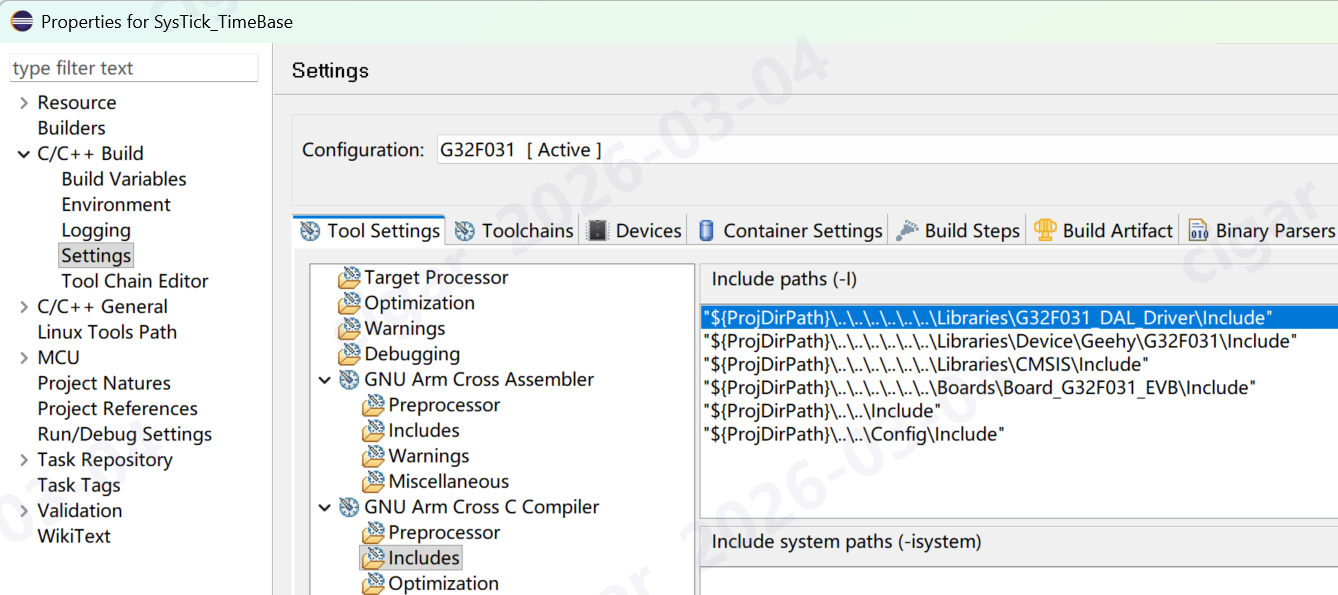
Check Properties -> Resource -> Linked Resources for broken links.
Flash Errors: If you encounter issues accessing Flash memory, verify that the linker script (g32f031x8_flash.ld) is correctly configured and referenced in the build settings.
By following this guide, you can leverage the full power of the Eclipse ecosystem for your Geehy G32F031 development, completely free of charge. Happy coding!
