*This content has been reposted with the approval of the original author.
preface
It was found that during the debugging process using Keil+J-Link, J-Link always Pop-up prompt window when downloading for the first time

Although we can select the corresponding chip core to download.
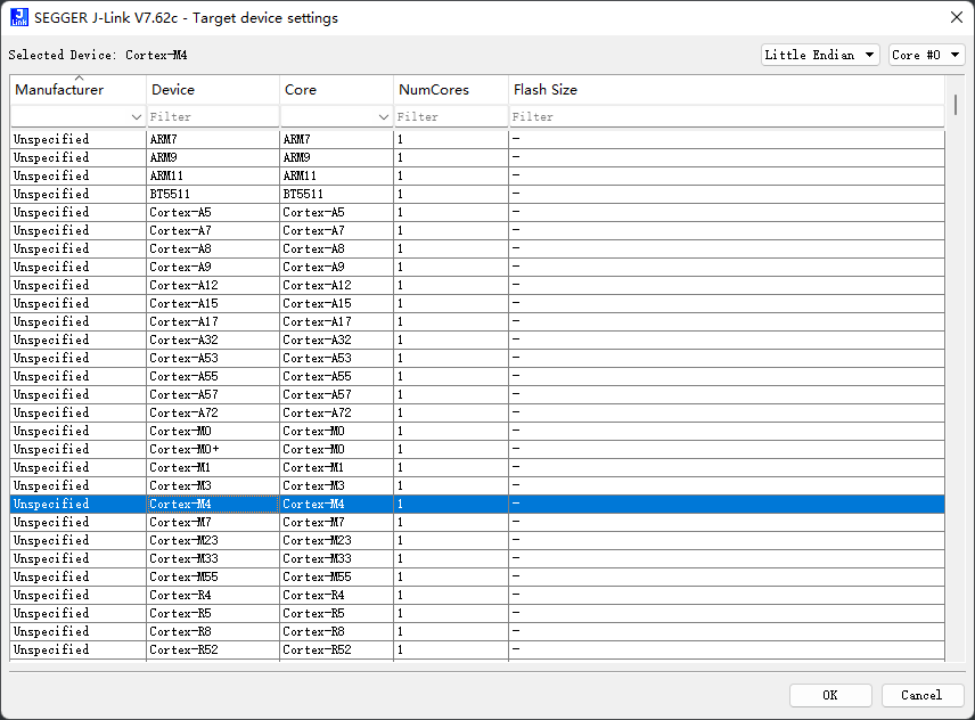
But it would be so troublesome to do it that I plan to remove this prompt window.
Operating environment
- Windows 11
- J-Link V9(v7.62)
- APM32F407ZG chip
- Keil MDK 5.36
1 Foundation Studies
We can learn that J-Link failed to identify our target chip from the prompt window, so we only need to know how to make our target model included in the list of chips supported by J-Link.
By searching the install directory of J-Link (Mine is C:\Program Files\SEGGER\JLink\Doc\Manuals), I found its user’s manual:
Reading through the contents of UM08001_JLink.pdf, I learned how to add devices to J-Link.
1.1 JLinkDevices.xml
In Section 4.5.26 of J-Link, it reminds that this file can store some new equipment that has not been disclosed. So we can add some new device that we need to make J-Link support our chips.

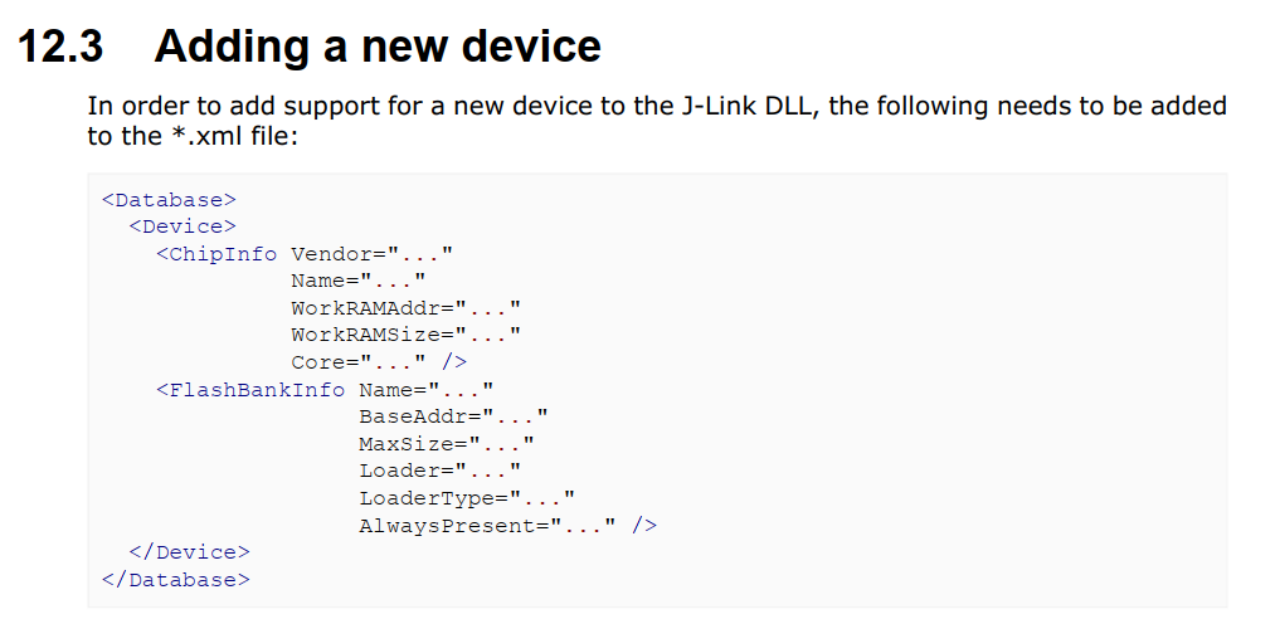
We can also open the JLinkDevices.xml of install directory to find how it works.
<!– –>
<!– Altera –>
<!– –>
<Device>
<ChipInfo Vendor=“Altera” Name=“Cyclone V” Core=“JLINK_CORE_CORTEX_A9” WorkRAMAddr=“0xFFFF0000” WorkRAMSize=“0×00010000” />
<FlashBankInfo Name=“QSPI Flash” BaseAddr=“0×00000000” MaxSize=“0×02000000” Loader=“Devices/Altera/Cyclone_V/Altera_Cyclone_V_QSPI.elf” LoaderType=“FLASH_ALGO_TYPE_OPEN” />
</Device>
When we add a new device to the J-Link, we should pay attention to two signals including <ChipInfo> and <FlashBankInfo>, which need us to provide some contents.
1.2 ChipInfo
We need to provide the Vendor, Name, Core, WorkRAMAddr and WorkRAMSize of Core in <ChipInfo> individually. After these, we can find that there is an example in the manual:
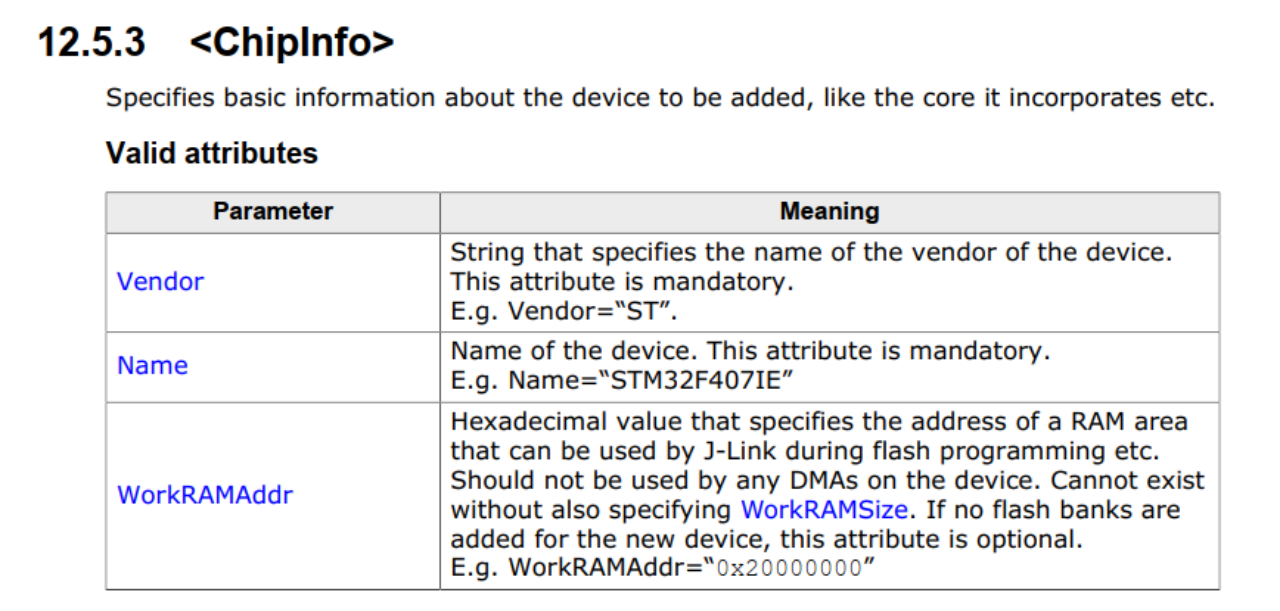
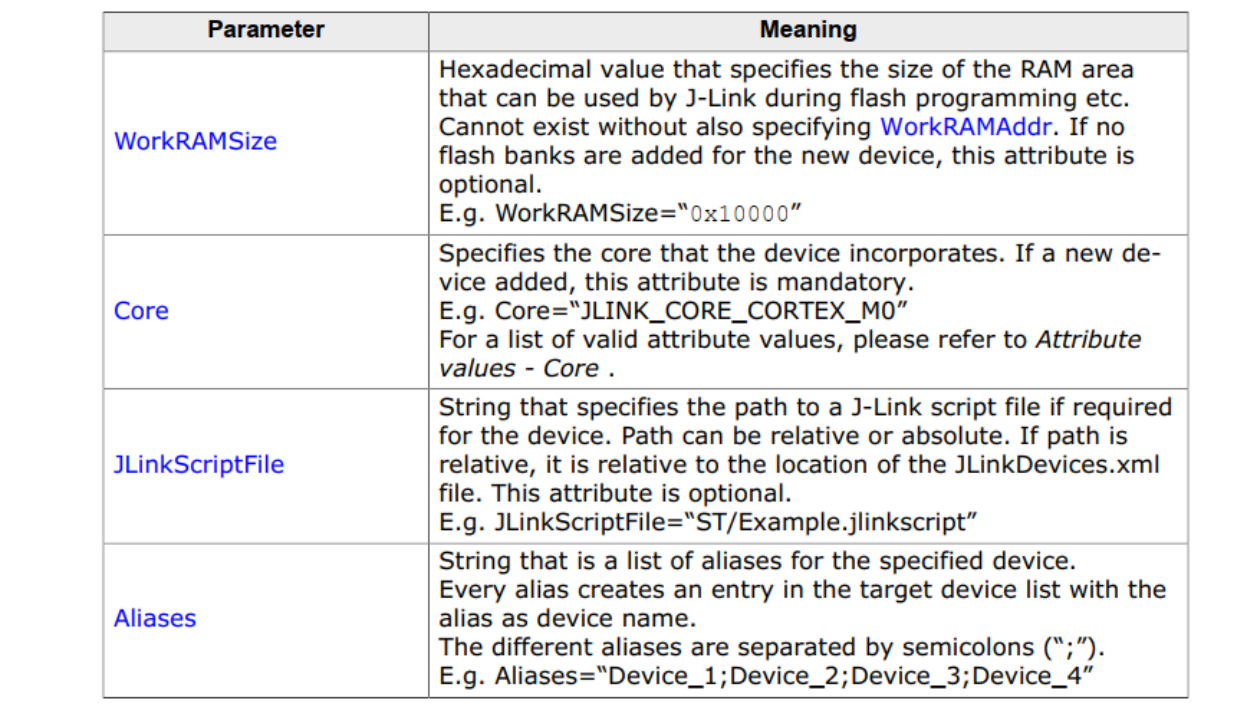
1.3 FlashBankInfo
We can also learn about the content which needs us to complete in <FlashBankInfo>

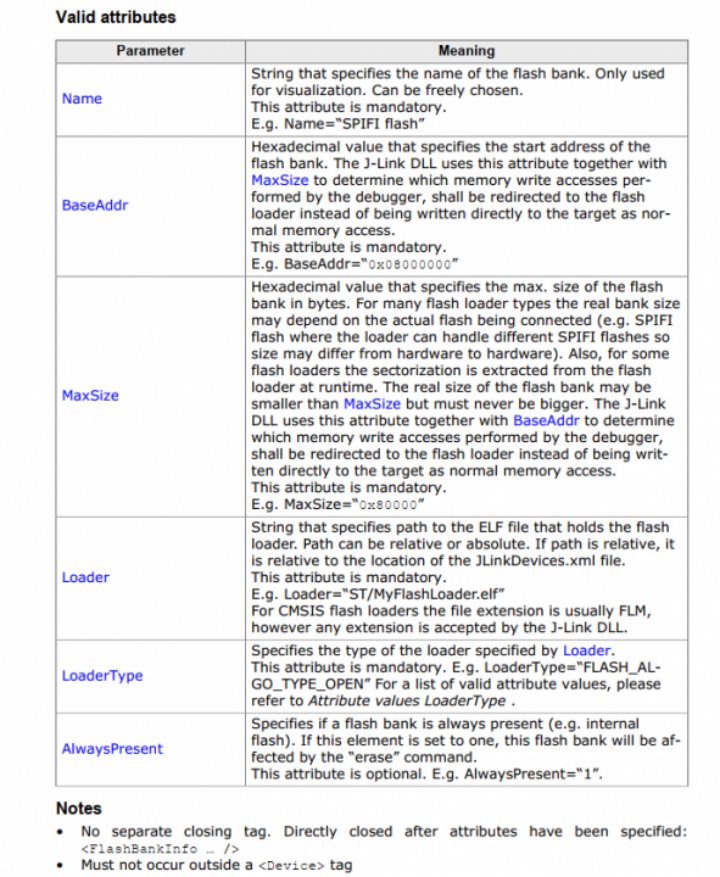
It is worth noting that in the Loader content description, J-Link mentioned that the algorithm of the download is the track of the file “JLinkDevices. xml”, which means that the algorithm of the download needs to be copied to the install directory of J-Link.
2 Downloading algorithm
We know that it is very easy to obtain some information about adding chips after learning the Foundation Studies including chip vendor, name, core, RAM information, and Flash information. The only difficulty is how do we solve the problem of the downloading algorithm?
The Keil can normally download MCUs in APM32, and Geehy provides the downloading algorithm. Then where is it? Can we use it?
Well, let’s pay attention to here. The downloading algorithm used by Keil is based on the FLM file of the CMSIS standard, and this algorithm is also supported by J-Link, and you may not have noticed that there is a description in the FlashBankInfo tab in the downloading algorithm column.

The downloading algorithm is located in the install directory of Keil’s pack. You can click Keil’s Pack window to see it.
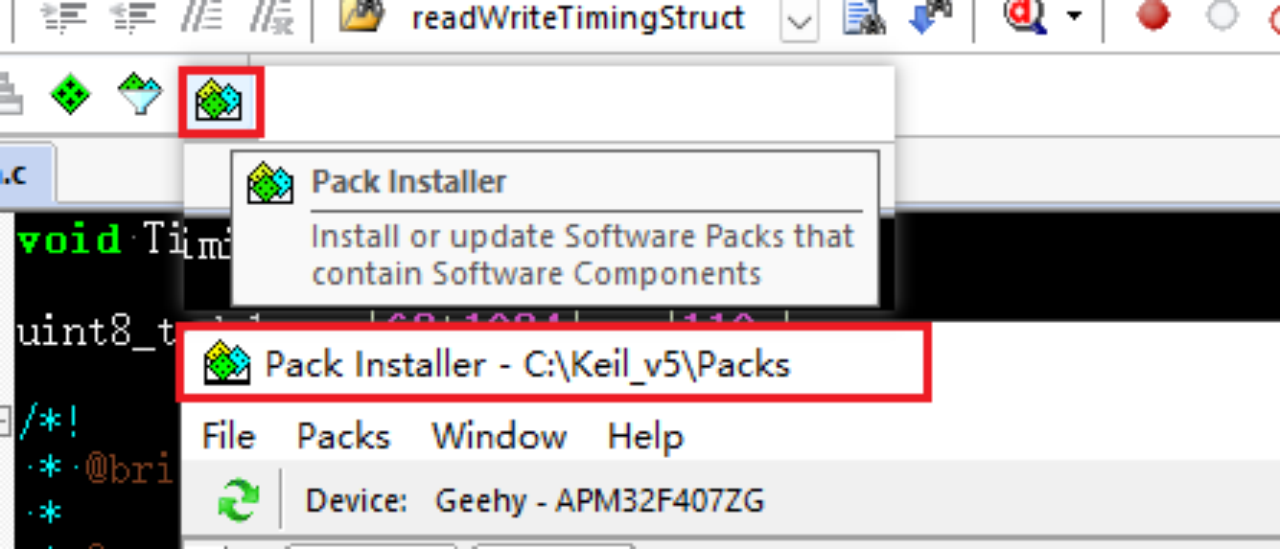
We will find the algorithm provided by Geehy under the install directory.
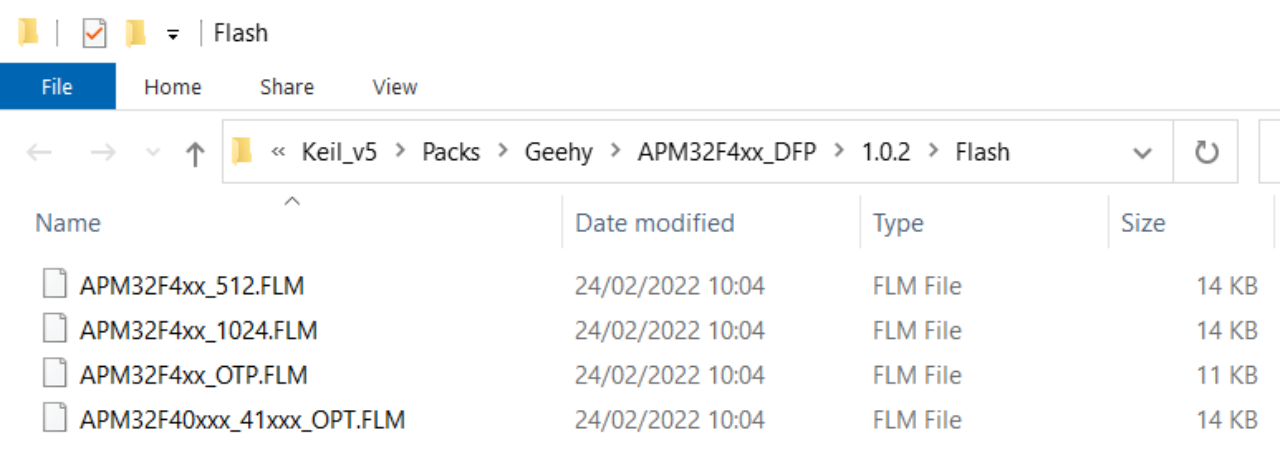
Then, we get APM32F4xx_1024.FLM and APM32F4xx_512.FLM of APM32F4 programming Flash
3 Edit JLinkDevices.xml
After obtaining the downloading algorithm, we can edit the JLinkDevices.xml file to support the new device. Here’s an example:
<Device>
<ChipInfo Vendor=“Geehy” Name=“APM32F417IG” Core=“JLINK_CORE_CORTEX_M4” WorkRAMAddr=“0×20000000” WorkRAMSize=“0×00020000” />
<FlashBankInfo Name=“IROM1” BaseAddr=“0×08000000” MaxSize=“0×00100000” Loader=“Devices/Geehy/APM32F4/APM32F4xx_1024.FLM” LoaderType=“FLASH_ALGO_TYPE_OPEN” AlwaysPresent=“1”/>
</Device>
Note that the JLinkDevices.xml file requires administrator privileges to edit
4 Add all APM32 models
I have also completed the creation of all APM32 files of the algorithm of the download
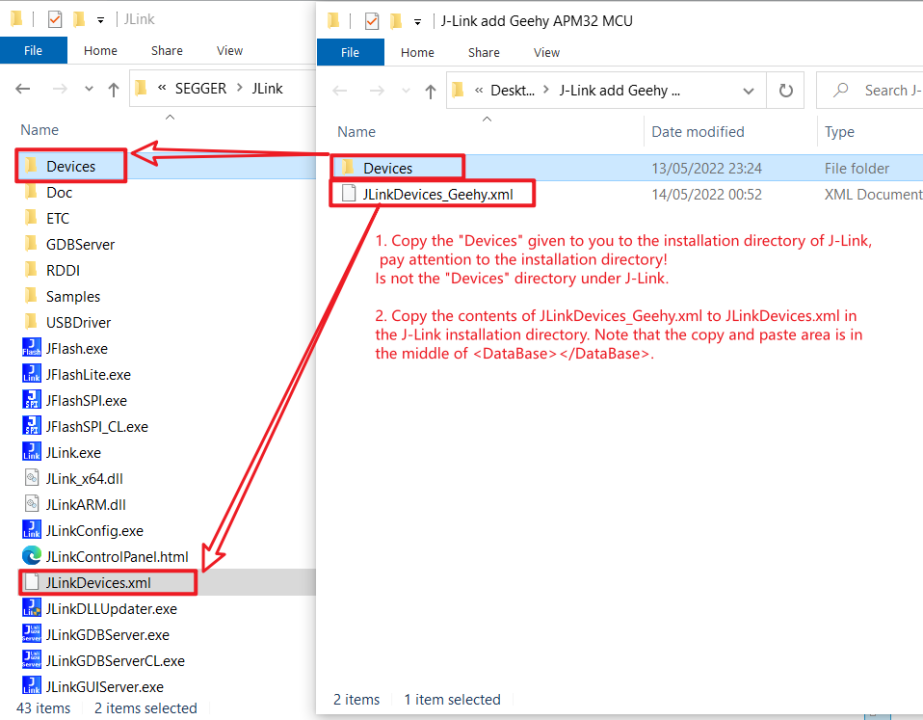
There are two steps in completing supportion
- Copy the “Devices” to J-Link Install directory, It is the install directory! Not the “Devices” directory under J-Link.
- Copy the contents of the JLinkDevis-Geehy.xml file to JLinkDevices.xm. Note that the copy and paste area is in the middle of <DataBase></DataBase>. For example:

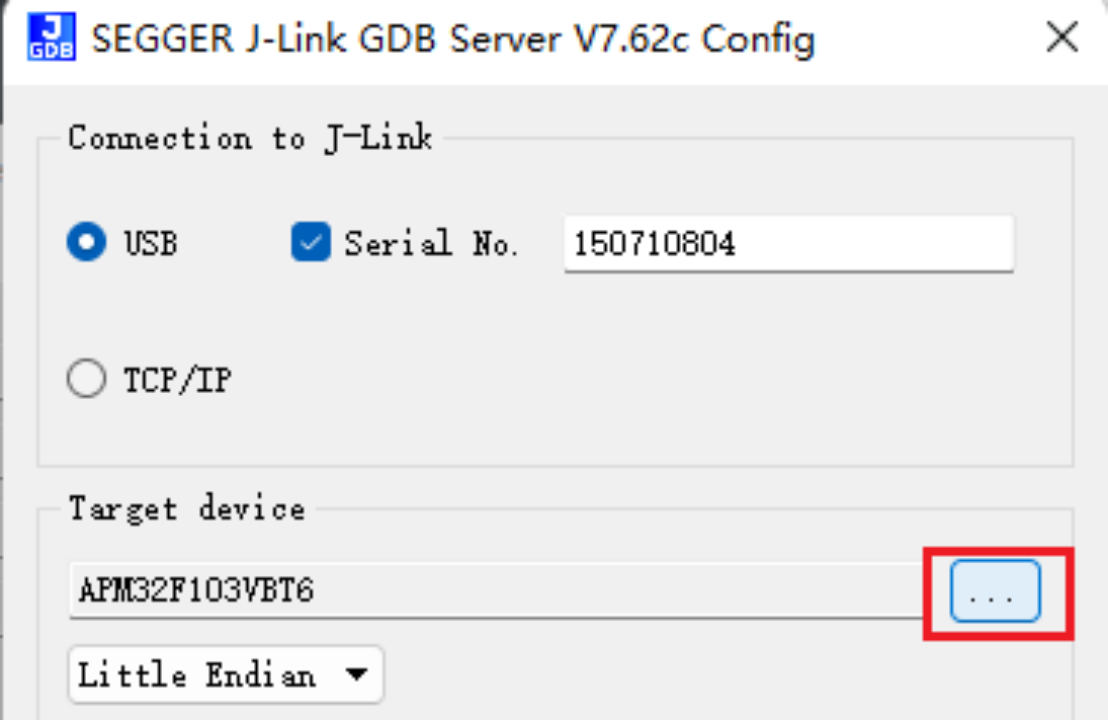
Next, we will verify the effect of adding chips and open “J-Link GDB Server”,

Select the device in the pop-up setup window.
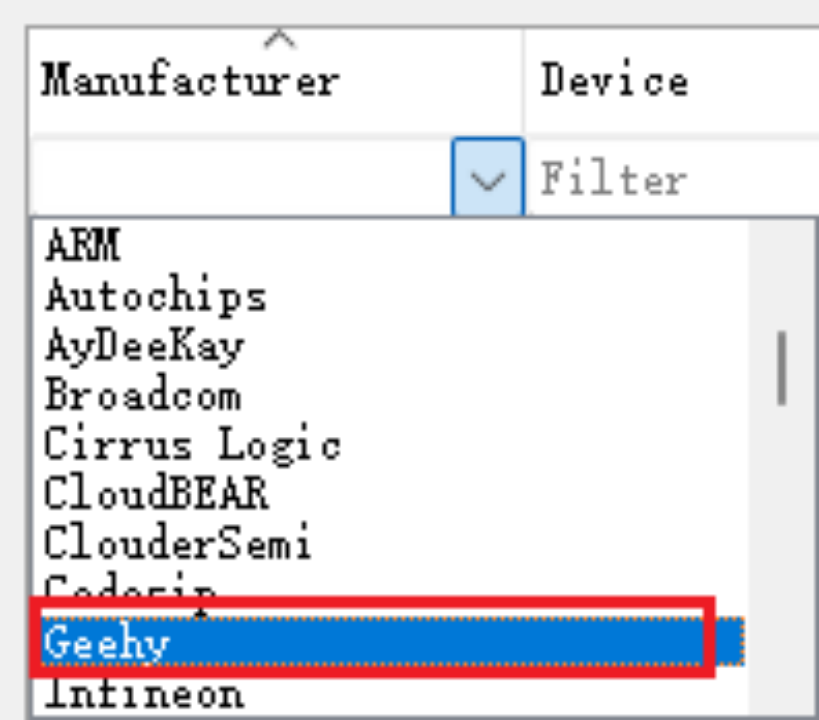
Select Geehy in the Vendor column in the Device window,
We can see the chips we just added.
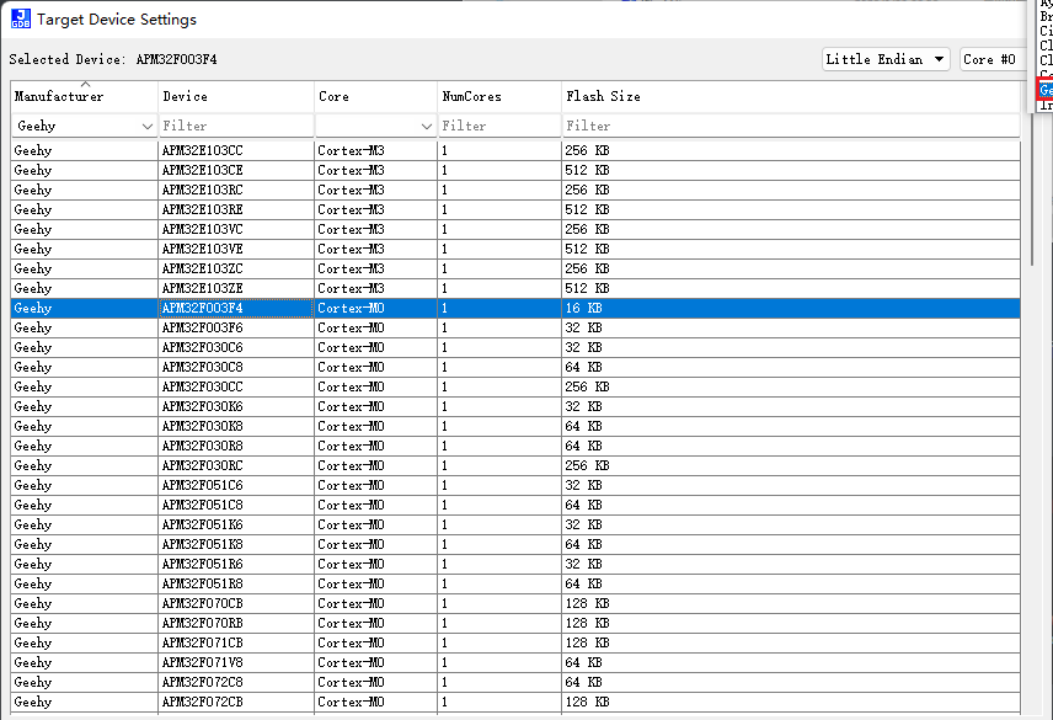
If we open a new project at this time, we will not be reminded of unknown equipment.
Now, our explanation of adding Geehy chip to J-Link ends here. I am a beginner, it is inevitable that there are some mistakes,
if any, please point them out. If this post helps you a lot would you mind giving me a like~