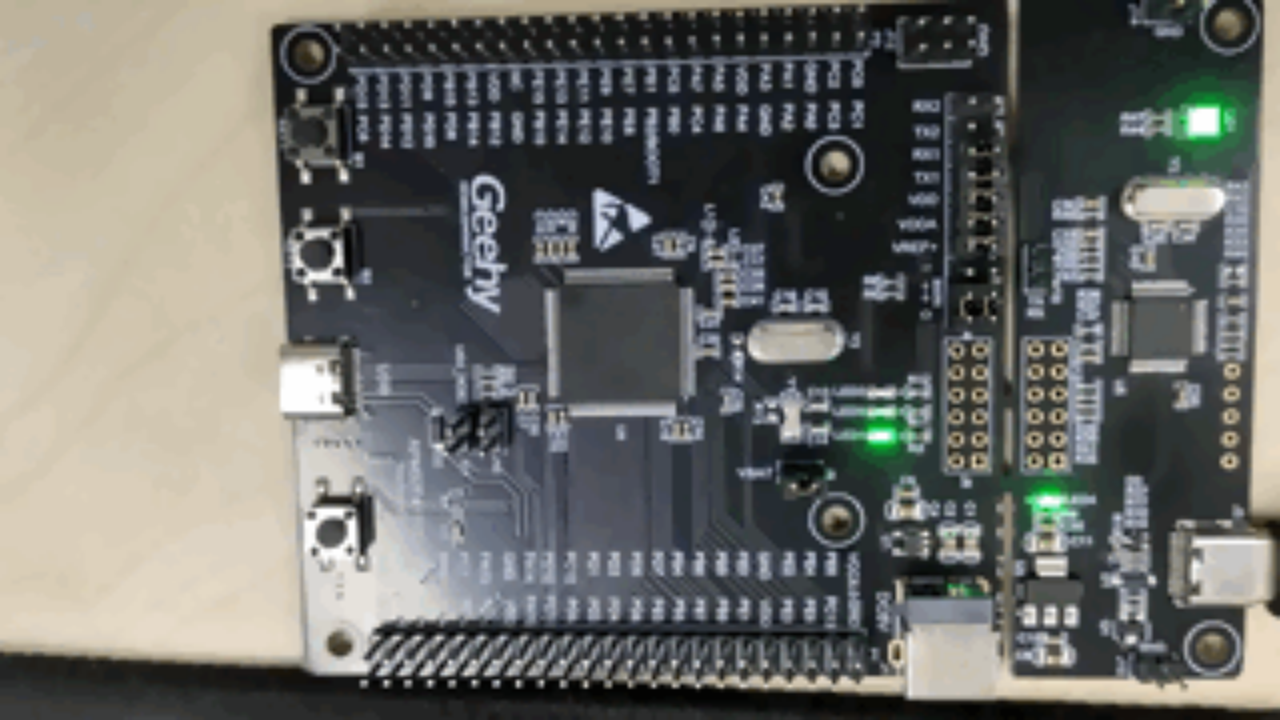
*This content has been reposted with the approval of the original author.
1. Background
Upon receiving the APM32F411 TINY board, I explored the SDK provided by the official documentation, which includes project examples for MDK, IAR, and Eclipse. While these examples are excellent, I wondered how to compile programs without installing an IDE in certain scenarios.
Through research, I discovered that it’s possible to use the open-source toolchain GCC + Makefile for program compilation. Analyzing Geehy’s Eclipse project revealed it is compiled using the GCC toolchain. This led me to the idea of setting up a local compilation environment with GCC + Makefile to compile APM32F411 programs without using an IDE.
After completing the program compilation, we need to download it. Since the onboard debugger of the APM32F411 TINY board is based on CMSIS-DAP, it seemed logical to use ARM’s PyOCD for program downloads.
With the theoretical steps for program compilation and download in mind, let’s proceed with the practical implementation.
2. Toolchain Preparation
Before transferring code, it’s essential to set up the required environment. I’m using a Windows environment, so I’ll download the necessary toolchains and add their paths to the system variables, enabling CMD commands to use the target toolchain programs directly.
2.1 make Toolchain
The make toolchain serves as the foundation for our compilation script. There are various make tools available, and I’ve chosen xPack Windows Build Tools there:
https://github.com/xpack-dev-tools/windows-build-tools-xpack/releases
The installation instructions are available here: https://xpack.github.io/dev-tools/windows-build-tools/install/
I’ll briefly describe it here:
①Download the xPack Windows Build Tools version (e.g., 4.3.0).
②Extract the downloaded archive to a suitable location, like the C drive.
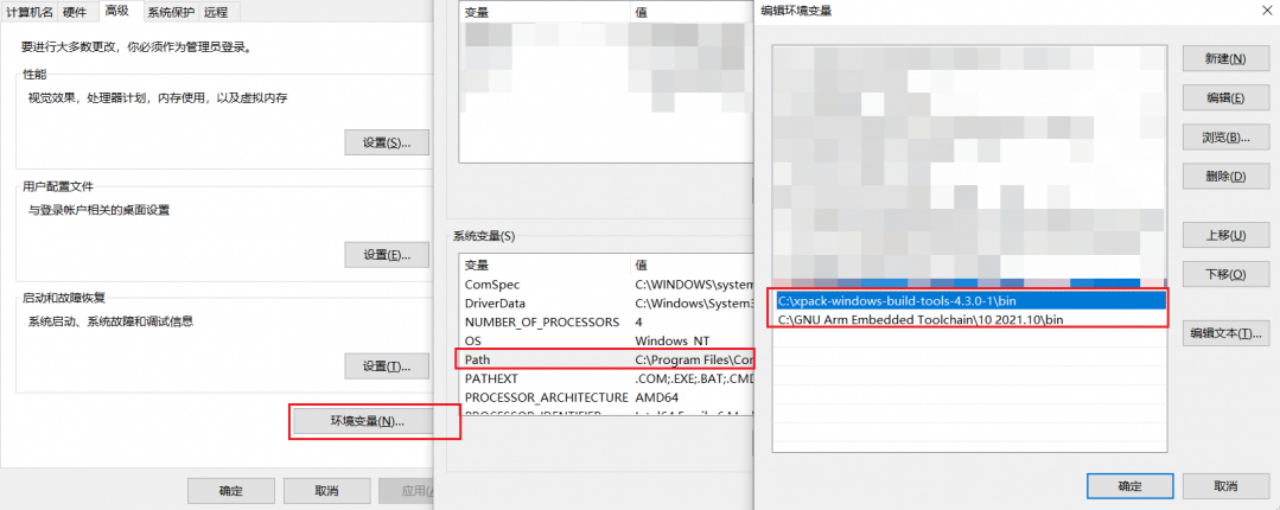
③Add the path to the make.exe to the system environment variables, e.g., C:\xpack-windows-build-tools-4.3.0-1\bin.
④Check if the make program is successfully added to the system variables by entering “make -v” in the CMD command window.

2.2 GCC Toolchain
As the APM32F411 is based on the Arm® Cortex®-M4F core, we need the GNU Arm Embedded Toolchain.
Download the toolchain from the official website: https://developer.arm.com/downloads/-/gnu-rm. I’ve chosen version 10 2021.10.
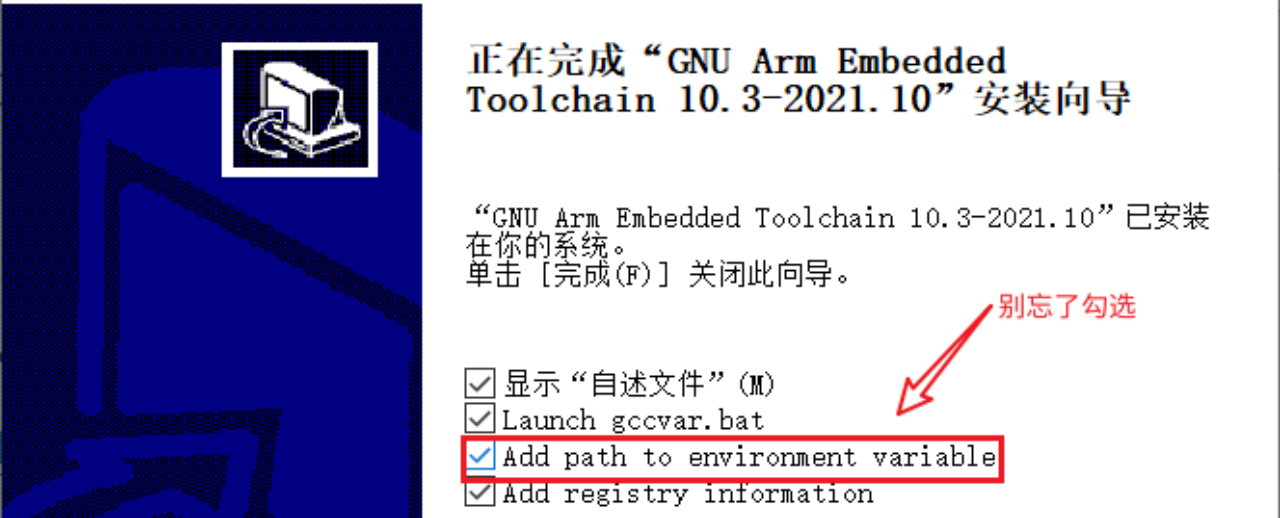
The toolchain provides both an installer and a compressed package. For the compressed package, configure the system environment variables manually (similar to the make toolchain above; its path for me is: C:\GNU Arm Embedded Toolchain\10 2021.10\bin, and inside there is the file ‘arm-none-eabi-gcc.exe’). For the installer, be sure to select the option “Add path to environment variable” during installation.
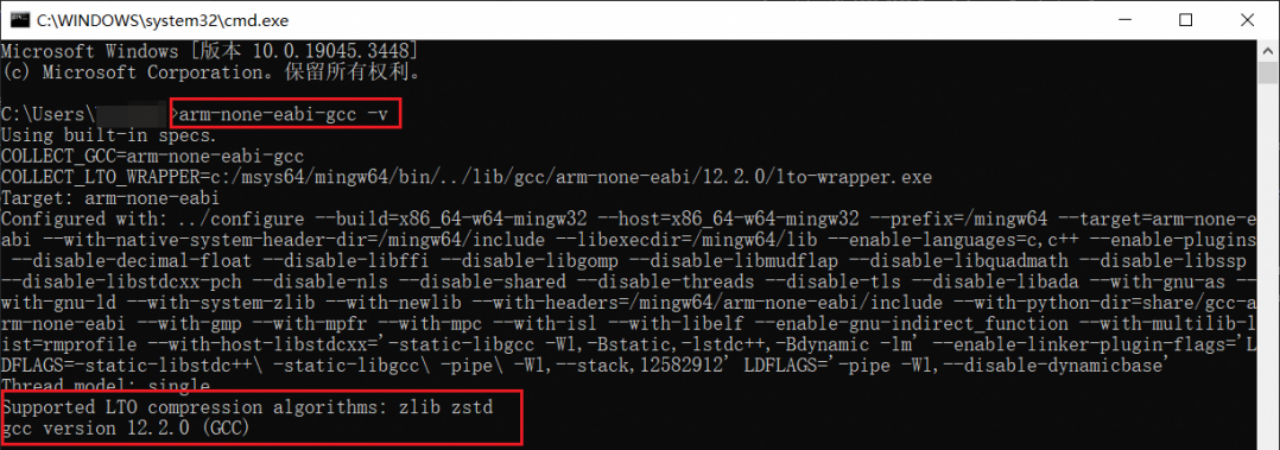
Check the GCC support by entering the command “arm-none-eabi-gcc -v” in CMD. If it prints the version information, the configuration is successful.
Here, let me show you the system environment variable settings interface (you can directly use the WIN+Q shortcut key and search for “Environment Variables”).
2.3 PyOCD Toolchain
Visit the PyOCD official website for this toolchain:
https://link.zhihu.com/?target=https%3A//github.com/pyocd/pyOCD.
PyOCD allows command-line downloads of programs to Arm® Cortex®-M chips via CMSIS-DAP.
PyOCD is based on Python, so install Python first from python.org: https://www.python.org/downloads/windows/. After installing Python, enter the command “pip install -i https://pypi.tuna.tsinghua.edu.cn/simpl pyocd” in CMD to install PyOCD.
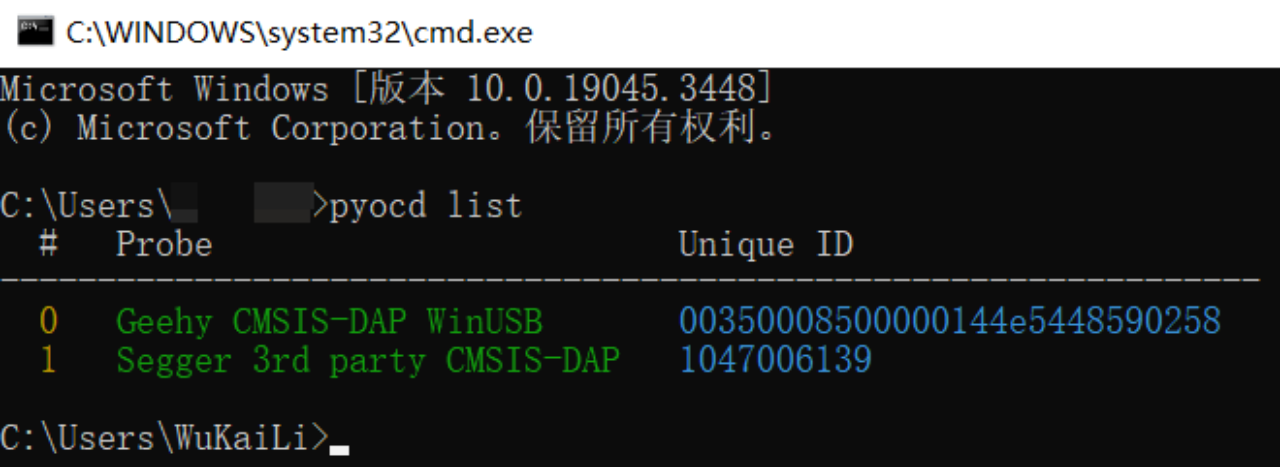
Confirm the connected debuggers by entering the “pyocd list” in CMD.
3. Source Code Selection
Considering the GCC toolchain environment, we need the corresponding version of the kernel source code. This includes selecting the appropriate link script file and startup file for GCC versions.
To facilitate future program writing, create a new folder and copy the necessary source code into it:
①Essential onboard files and library files: Copy “Boards” and “Libraries” to the new folder.

②Copy the folder from “APM32F4xx_SDK_V1.4\APM32F4xx_SDK_V1.4\Examples\SysTick” to the new folder.

Delete the “Project” folder inside, as we won’t need this IDE project.
③Copy link script files and startup files: Copy “APM32F4xx_SDK_V1.4\Libraries\Device\Geehy\APM32F4xx\Source\gcc\APM32F4xxxE_FLASH.ld” and “startup_apm32f411.S” to the new folder

Now, our source code is prepared.
4. Write makefile Script
As we act as the role of an IDE using a makefile, let’s recall the basic settings our IDE needs for compiling a program. Indeed, settings such as project name, source code inclusion, header file inclusion, macro definitions, output directory, output content, compilation optimization level, and others need to be set one by one.
We’ll create a new text file, name it “Makefile,” and remove the suffix. Then, step by step, write the following content into the file:
4.1 Project Name Setting
Set the project name (e.g., SysTick_TimeBase).
######################################
# target
######################################
TARGET = SysTick_TimeBase
4.2 Compilation Settings
Set whether the compilation is for debugging and the optimization level.
######################################
# building variables
######################################
# debug build?
DEBUG = 1
# optimization
OPT = -Og
4.3 Compilation Folder Settings
Set the output folder for compiled files.
#######################################
# paths
#######################################
# Build path
BUILD_DIR = build
4.4 Source Code Inclusion
Specify the paths of the source code to include.
######################################
# source
######################################
# C sources
C_SOURCES = \
SysTick_TimeBase/Source/main.c \
SysTick_TimeBase/Source/apm32f4xx_int.c \
SysTick_TimeBase/Source/system_apm32f4xx.c \
Boards/Board.c \
Libraries/APM32F4xx_StdPeriphDriver/src/apm32f4xx_adc.c \
Libraries/APM32F4xx_StdPeriphDriver/src/apm32f4xx_can.c \
Libraries/APM32F4xx_StdPeriphDriver/src/apm32f4xx_crc.c \
Libraries/APM32F4xx_StdPeriphDriver/src/apm32f4xx_cryp.c \
Libraries/APM32F4xx_StdPeriphDriver/src/apm32f4xx_cryp_aes.c \
Libraries/APM32F4xx_StdPeriphDriver/src/apm32f4xx_cryp_des.c \
Libraries/APM32F4xx_StdPeriphDriver/src/apm32f4xx_cryp_tdes.c \
Libraries/APM32F4xx_StdPeriphDriver/src/apm32f4xx_dac.c \
Libraries/APM32F4xx_StdPeriphDriver/src/apm32f4xx_dbgmcu.c \
Libraries/APM32F4xx_StdPeriphDriver/src/apm32f4xx_dci.c \
Libraries/APM32F4xx_StdPeriphDriver/src/apm32f4xx_dma.c \
Libraries/APM32F4xx_StdPeriphDriver/src/apm32f4xx_dmc.c \
Libraries/APM32F4xx_StdPeriphDriver/src/apm32f4xx_eint.c \
Libraries/APM32F4xx_StdPeriphDriver/src/apm32f4xx_fmc.c \
Libraries/APM32F4xx_StdPeriphDriver/src/apm32f4xx_gpio.c \
Libraries/APM32F4xx_StdPeriphDriver/src/apm32f4xx_hash.c \
Libraries/APM32F4xx_StdPeriphDriver/src/apm32f4xx_hash_md5.c \
Libraries/APM32F4xx_StdPeriphDriver/src/apm32f4xx_hash_sha1.c \
Libraries/APM32F4xx_StdPeriphDriver/src/apm32f4xx_i2c.c \
Libraries/APM32F4xx_StdPeriphDriver/src/apm32f4xx_iwdt.c \
Libraries/APM32F4xx_StdPeriphDriver/src/apm32f4xx_misc.c \
Libraries/APM32F4xx_StdPeriphDriver/src/apm32f4xx_pmu.c \
Libraries/APM32F4xx_StdPeriphDriver/src/apm32f4xx_rcm.c \
Libraries/APM32F4xx_StdPeriphDriver/src/apm32f4xx_rng.c \
Libraries/APM32F4xx_StdPeriphDriver/src/apm32f4xx_rtc.c \
Libraries/APM32F4xx_StdPeriphDriver/src/apm32f4xx_sdio.c \
Libraries/APM32F4xx_StdPeriphDriver/src/apm32f4xx_smc.c \
Libraries/APM32F4xx_StdPeriphDriver/src/apm32f4xx_spi.c \
Libraries/APM32F4xx_StdPeriphDriver/src/apm32f4xx_syscfg.c \
Libraries/APM32F4xx_StdPeriphDriver/src/apm32f4xx_tmr.c \
Libraries/APM32F4xx_StdPeriphDriver/src/apm32f4xx_usart.c \
Libraries/APM32F4xx_StdPeriphDriver/src/apm32f4xx_wwdt.c
4.5 Startup File Setting
Set the startup file. Change the startup file’s suffix to lowercase “s.”
ASM sources
ASM_SOURCES = \
startup_apm32f411.s
4.6 Compile MCU Core
Set the compilation for the MCU core and FPU. Use the toolchain “arm-none-eabi-” and specify the core as Arm® Cortex®-M4F.
#######################################
# binaries
#######################################
PREFIX = arm-none-eabi-
# The gcc compiler bin path can be either defined in make command via GCC_PATH variable (> make GCC_PATH=xxx)
# either it can be added to the PATH environment variable.
ifdef GCC_PATH
CC = $(GCC_PATH)/$(PREFIX)gcc
AS = $(GCC_PATH)/$(PREFIX)gcc -x assembler-with-cpp
CP = $(GCC_PATH)/$(PREFIX)objcopy
SZ = $(GCC_PATH)/$(PREFIX)size
else
CC = $(PREFIX)gcc
AS = $(PREFIX)gcc -x assembler-with-cpp
CP = $(PREFIX)objcopy
SZ = $(PREFIX)size
endif
HEX = $(CP) -O ihex
BIN = $(CP) -O binary -S
#######################################
# CFLAGS
#######################################
# cpu
CPU = -mcpu=cortex-m4
# fpu
FPU = -mfpu=fpv4-sp-d16
# float-abi
FLOAT-ABI = -mfloat-abi=hard
# mcu
MCU = $(CPU) -mthumb $(FPU) $(FLOAT-ABI)
4.7 Macro Definition Setting
Set the required macro definitions.
C defines
C_DEFS = \
-DAPM32F411 \
-DAPM32F411_TINY
4.8 Header File Inclusion Setting
Set the paths for the required header files.
# C includes
C_INCLUDES = \
-ILibraries/APM32F4xx_StdPeriphDriver/inc \
-ILibraries/Device/Geehy/APM32F4xx/Include \
-ILibraries/CMSIS/Include \
-IBoards \
-ISysTick_TimeBase/Include \
4.9 Link Script File Setting
Set the path of the link script file.
#######################################
# LDFLAGS
#######################################
# link script
LDSCRIPT = APM32F4xxxE_FLASH.ld
4.10 Others
This section includes compilation instructions and operations. It can be used directly, and due to space constraints, I won’t provide examples here. You can refer to the attached file for more details.
5. Compile the Program
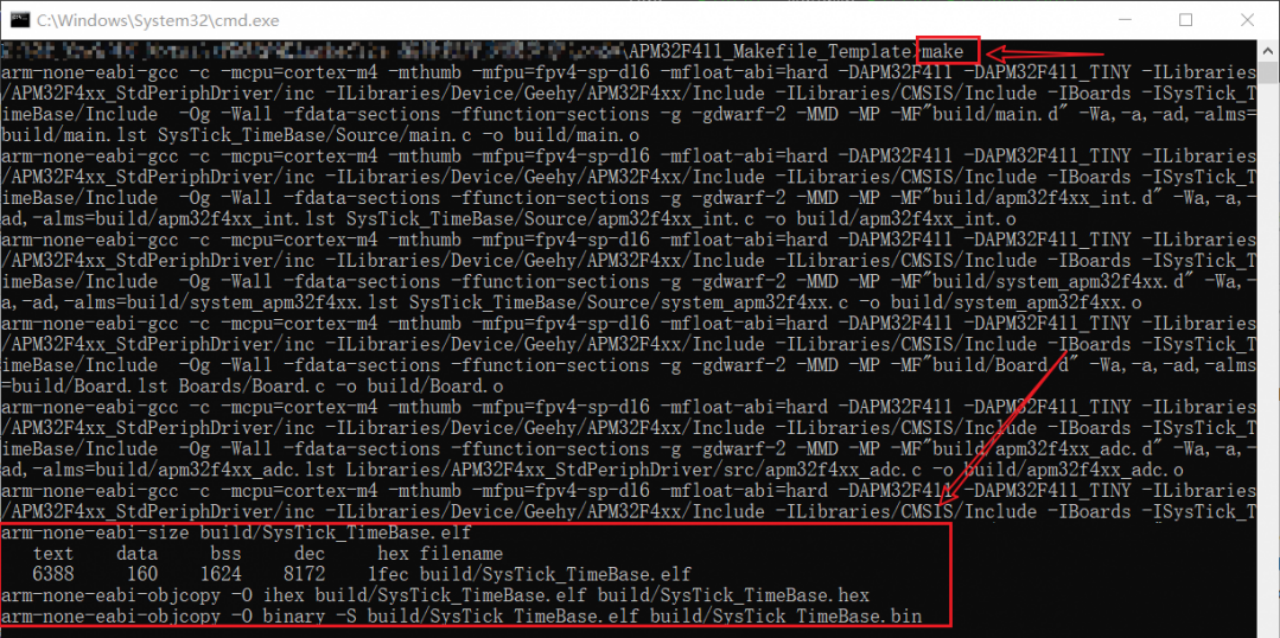
Launch CMD in the project directory and enter “make” to initiate the code compilation. The final compilation result will be as follows:
6. Download the Program
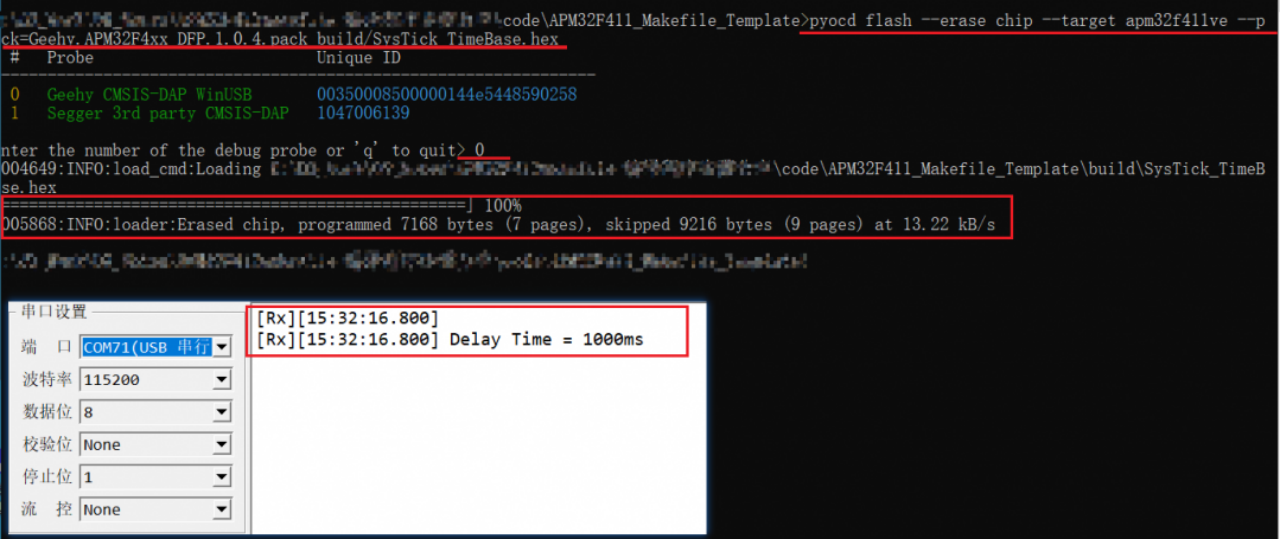
Here, we will use PyOCD to download the program. Copy “Geehy.APM32F4xx_DFP.1.0.4.pack” to our project directory. Then, in the directory, launch CMD and enter:
pyocd flash --erase chip --target apm32f411ve --pack=Geehy.APM32F4xx_DFP.1.0.4.pack build/SysTick_TimeBase.hex
The final result shows that after the program is downloaded, the board’s LEDs will flash, and the current delay speed will be output to the serial port.
LED effect:
