*This content has been reposted with the approval of the original author.
1. Background
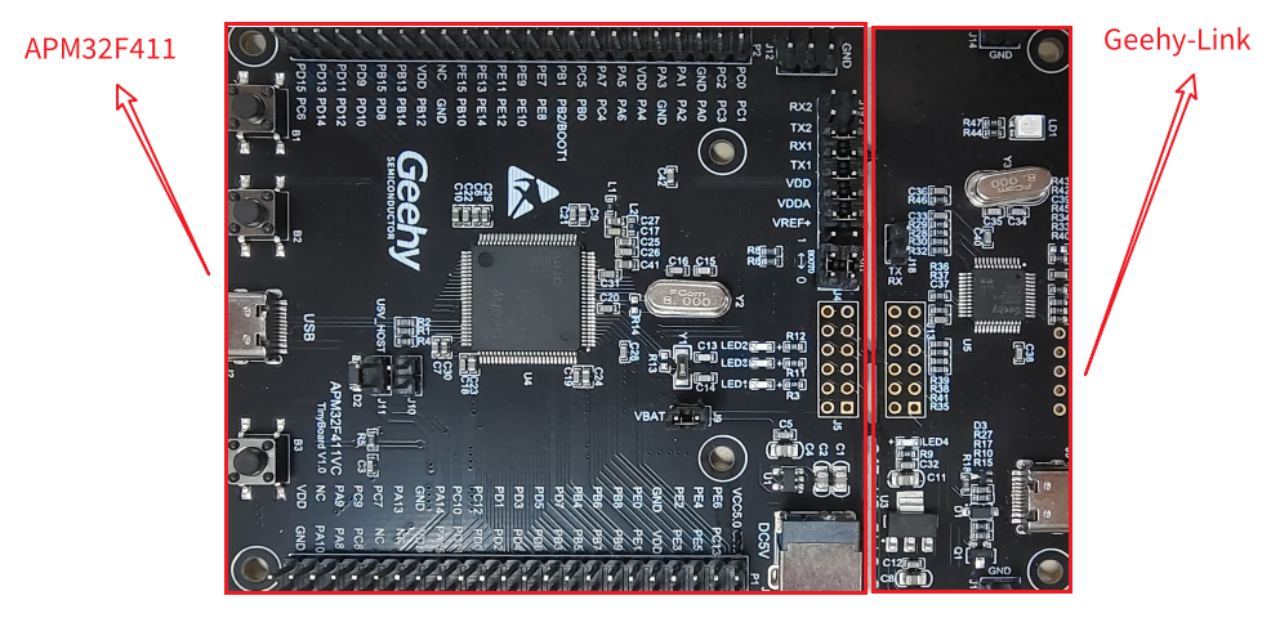
I recently acquired the APM32F411 TINY board from Geehy, featuring an onboard debugger based on CMSIS-DAP. This proves convenient in situations where IDEs like KEIL MDK/IAR are used, thanks to built-in CMSIS-DAP driver support in these IDEs.

Personally, I’ve been accustomed to using J-Link and its toolchain for some applications, employing tools like J-Link Commander for programming, reading chip content, or program control via the command line.
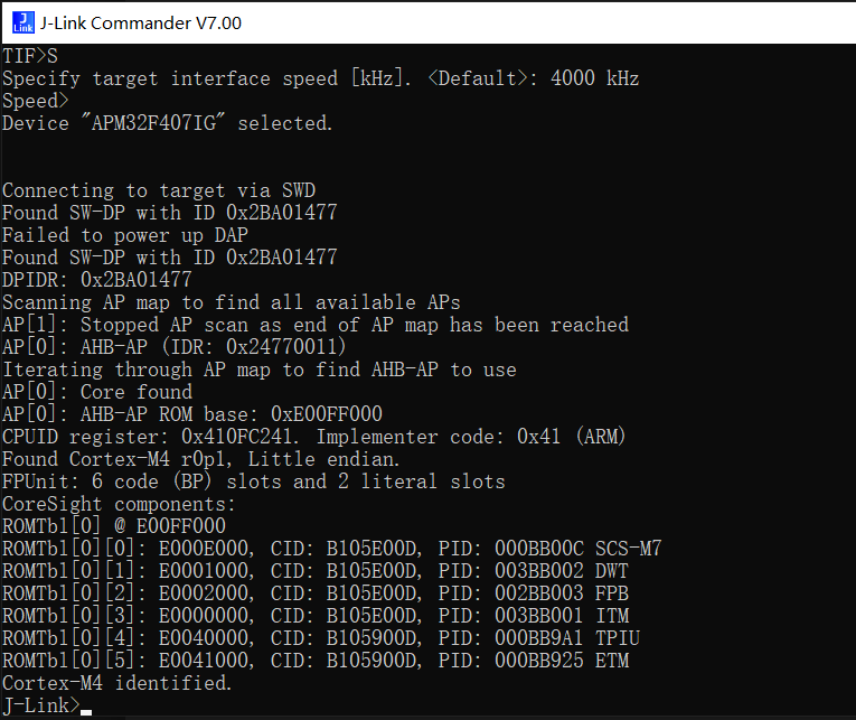
For instance, in the image below, I used J-Link Commander to connect to an APM32F407 MCU.

I wondered if there were command-line tools for CMSIS-DAP that could replace J-Link Commander. (PS: Hasn’t CMSIS-DAP already replaced J-Link? (#^.^#))
2. OpenOCD? pyOCD?
Considering command-line tools for CMSIS-DAP, OpenOCD, and pyOCD came to mind. Each tool has its characteristics.
Regarding OpenOCD:
①Early adoption and widespread use.
②Verification of OpenOCD compatibility across different chip models.
③Open-source project relying on community support for updates.
Regarding Pyocd:
①Python-based, requiring a Python environment installation, potentially affecting program responsiveness.
②Led by ARM, currently supporting only Cortex-M cores.
③Supports the CMSIS-Pack framework, making it usable if our chip is compatible with the Keil MDK development environment.
Given my preference for tool simplicity and avoiding excessive consideration of chip support, I chose pyOCD. (PS: I’m too lazy to adapt tools for chips. →_→ Mainly because I’m lazy)
Here are their official websites for reference:
OpenOCD:https://openocd.org/
pyOCD:https://pyocd.io/
3. pyOCD Installation
Opting for pyOCD, let’s see how to install it. (PS: There are many tutorials online, but I’ll simplify the steps here, specifically for Windows 10.)
3.1 Install Python Environment
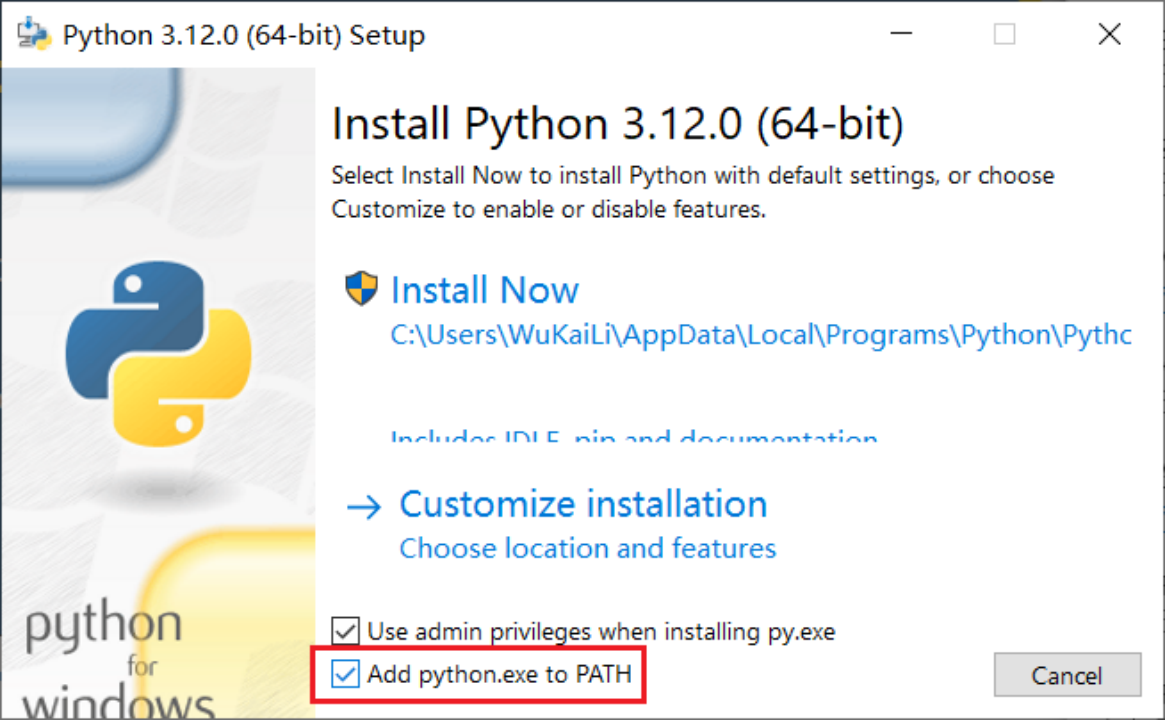
Download the Python installer for Windows from the official website: https://www.python.org/ftp/python/3.12.0/python-3.12.0-amd64.exe (PS: Since pyOCD requires Python 3.x, please confirm the version during the installation). Install by checking “Add python.exe to PATH.”

3.2 Verify Python Environment Installation
Use “Win + R” to open the command prompt and type “Python.” It should display the current Python version.

3.3 Install pyOCD
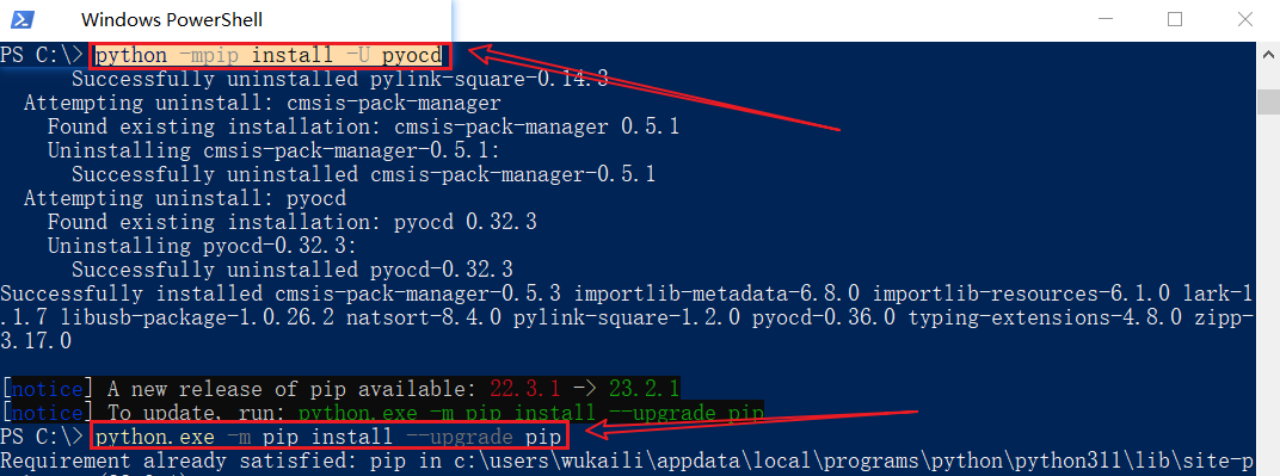
Use the following PowerShell command in the root directory of C drive (Shift + Right-click and select “Open PowerShell window here (S)”) and enter: python -mpip install -U pyocd.

It may prompt you to update pip; if so, enter the following command: python.exe -m pip install –upgrade pip.
3.4 Verify pyOCD Installation
In the PowerShell window, enter: pyocd –V. Check the current pyOCD version.

With these steps, our pyOCD environment is set up.
4. pyOCD Command Line Usage
Commonly, pyOCD is used to download programs to target chips. Here, I aim to control the APM32F411 using pyOCD’s command line or read its memory.
To achieve these functions, the general steps are:
Connect to the target chip.
Read instructions from the target chip.
Control the target chip with instructions.
Let’s start by launching the command line (Shift + Right-click and select “Open PowerShell window here (S)” from any directory).
4.1 Connect APM32F411
To control APM32F411 via the command line after connecting the target chip, use the command: pyocd commander –pack C:\Keil_v5\Packs.Download\Geehy.APM32F4xx_DFP.1.0.4.pack -t apm32f411ve. Here, “C:\Keil_v5\Packs.Download\Geehy.APM32F4xx_DFP.1.0.4.pack” is the Pack file path for my APM32F411, utilizing Keil MDK environment. Adjust this path accordingly.
PS: Errors may occur in this step, possibly due to a deep pack directory or containing Chinese characters.
Next, choose the corresponding emulator. For example, enter “0” for “Geehy CMSIS-DAP WinUSB.” Enter “0” and press Enter to display the connection status.

4.2 Read Chip Content
The command to read the target chip’s content is: rw(read a word).
Enter “rw 0×08000000 0×100” to read 0×100 words from APM32F411 starting at 0×08000000.

4.3 Stop Chip Program Execution
The pyOCD command to halt the chip’s program execution is: h.
Enter “h” to stop the chip’s program execution.

(PS: As my chip has a built-in LED blinking program, entering this command will stop the blinking. If your chip has no program, this command may not visibly change anything.)
4.4 Continue Chip Program Execution
The pyOCD command to continue the chip’s program execution is: g.
Enter “g” to resume the chip’s program execution.

(PS: As my chip has a built-in LED blinking program, entering “h” will stop the blinking, and entering “g” will restart it.)
4.5 Erase Instruction
The pyOCD command to erase the chip’s program is: erase. Enter “erase” to erase the chip’s program.

4.6 Program Download Instruction
The pyOCD command for program download is: load.
Enter “load FILENAME [ADDR]” to download the program (PS: Ensure the file path doesn’t contain Chinese characters, and the bin file should include the download address).
Example: “load D:\APM32F411_SysTick_TimeBase.hex”

4.7 Program Read Instruction
The pyOCD command for program read is: savemem.
Enter “savemem ADDR LEN FILENAME” to read and save the chip’s program (PS: Ensure the file path doesn’t contain Chinese characters, and the file format is a bin file).
Example: “savemem 0×08000000 0×2800 D:\APM32F411_SysTick_TimeBase_read.bin”

4.8 More Instructions
Certainly, pyOCD supports many commands. Just type “help,” and it will display all available commands.
(PS: Enter “q” to exit pyOCD’s command-line operation.)
5. Conclusion
Based on this overview, pyOCD seems to provide a good alternative to J-Link Commander. For those who have an APM32F411 TINY board, it’s worth exploring without the need to connect to a J-Link with flying wires.