In recent years, as embedded hardware and software ecosystems continue to grow, more developers have turned to open-source, free toolchains for embedded development. Visual Studio Code (VS Code) is a popular cross-platform, open-source source-code editor featuring a clean interface, powerful functionality, and excellent extensibility.
It is widely loved by developers globally.
By installing plugins tailored for embedded development, such as Embedded IDE, users can easily import traditional Keil MDK projects into VS Code and use the free, open-source GCC toolchain to build, compile, and manage embedded projects efficiently.
Cortex-debug is another powerful VS Code extension specifically designed for debugging ARM Cortex-based MCUs.
It seamlessly integrates with debugging tools such as OpenOCD and J-Link, providing professional debugging capabilities including breakpoints, single-stepping, register inspection, memory viewing, and more.
Additionally, OpenOCD (Open On-Chip Debugger) is an open-source debugging tool supporting most mainstream ARM architecture MCUs. It enables professional-grade debugging and simulation features at low cost. Combining VS Code with Embedded IDE, Cortex-debug extensions, and OpenOCD can form a free, extensible, efficient, and highly flexible embedded development environment, ideal for developers aiming to quickly set up projects and improve productivity.
This article explains in detail how to use VS Code, Embedded IDE, Cortex-debug plugins, and the OpenOCD toolchain to quickly set up, compile, and debug ARM embedded projects. It aims to help developers master a modern, efficient embedded development workflow.
Step 1: Creating the Project
For Geehy MCUs:
Choose the MDK (Keil) project type for your project.
For ST MCUs:
In STM32CubeMX, select MDK-ARM V5 as the toolchain/IDE, and generate the Keil project accordingly.
Note: The main purpose of generating the MDK-ARM V5 project is to import it easily into VS Code using the Embedded IDE plugin in the next steps.
Step 2: Importing into VS Code and Building with GCC
Open Visual Studio Code and install the Embedded IDE extension.
Use the Embedded IDE plugin’s “Import Keil Project” functionality to import the previously generated MDK-ARM V5 project.
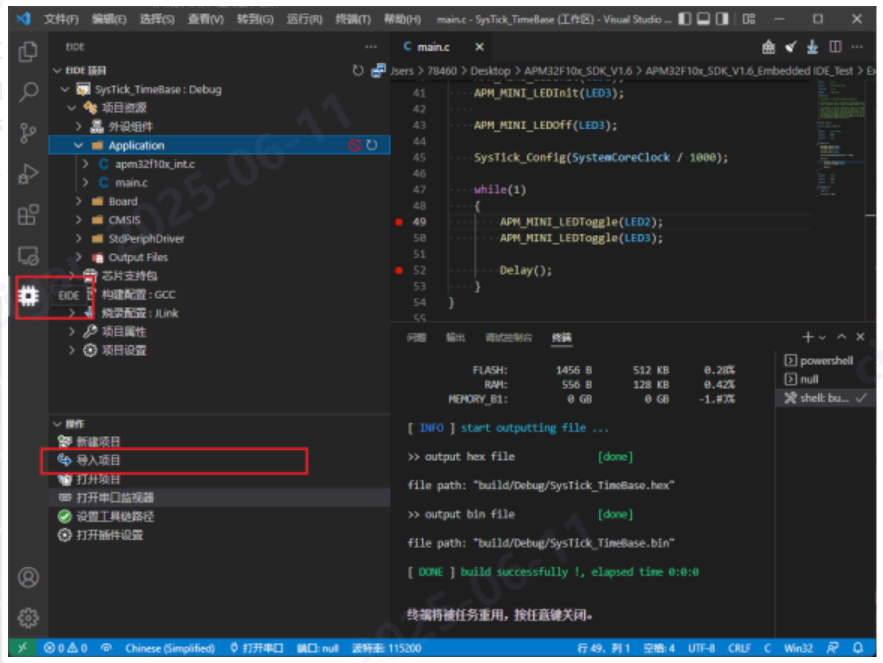
In the Embedded IDE project’s settings, change the default compiler toolchain from ARMCC to GCC (ARMCC is commercially licensed, while GCC is free and open-source).
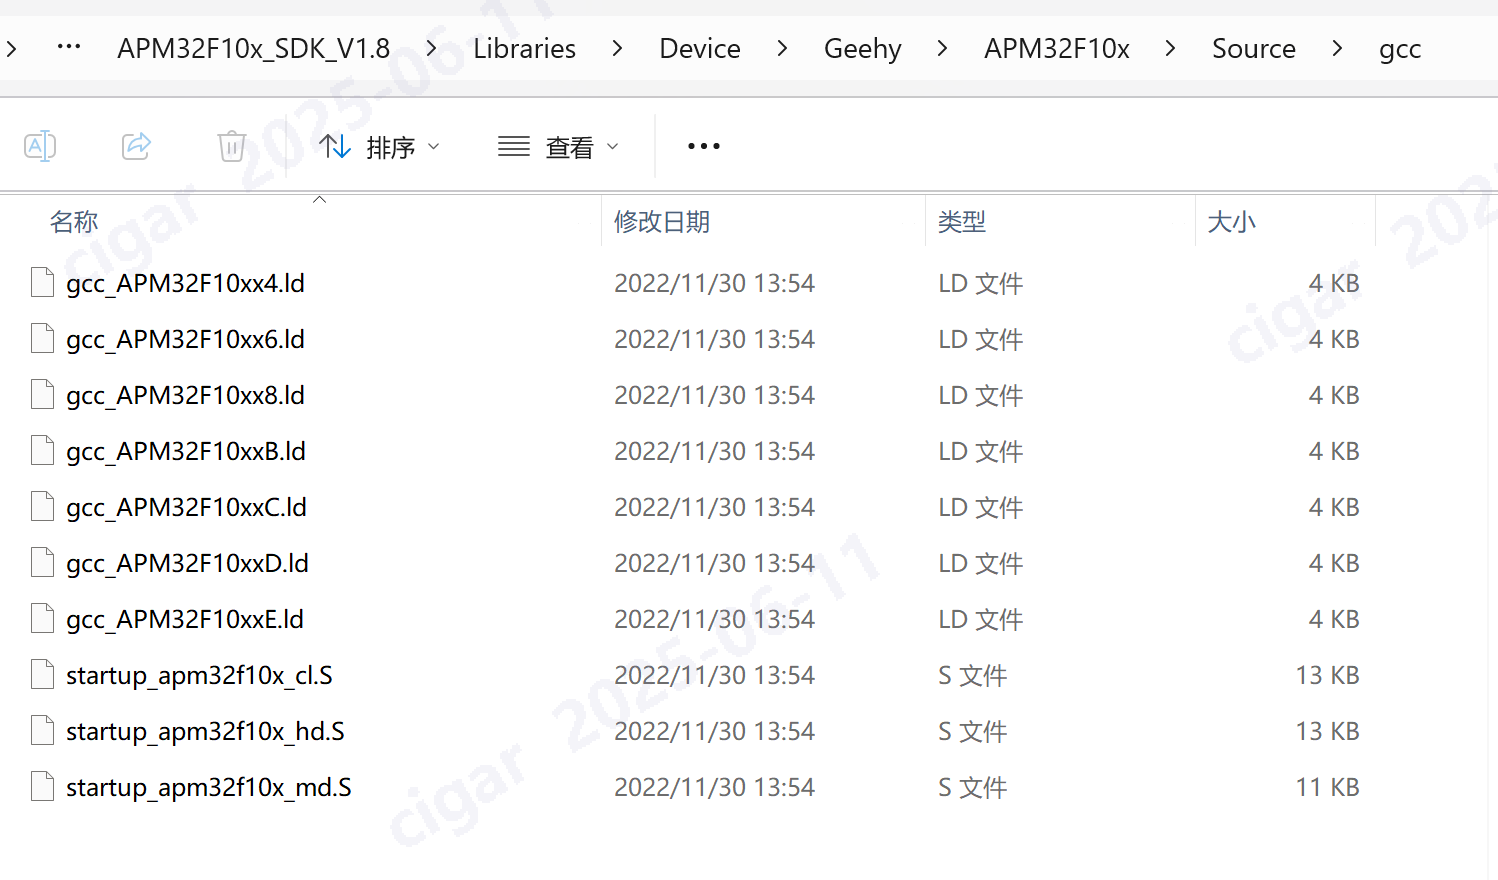
Replace the startup file:
Replace the original startup file (startup_stm32f10x_md.s) from the imported project with the Geehy-specific startup file (startup_apm32f10x_md.S).
Configure the GCC linker script:
Under “Build Configuration”, select the GCC toolchain, and specify the linker script path (e.g., gcc_APM32F10xxB.ld).
Build the project.

Step 3: Debugging and Emulation Setup
Install the GNU Arm Embedded Toolchain separately (this provides GCC cross-compilation tools for ARM).
For debugging and emulation:
Install the Cortex-debug extension in VS Code.
Depending on your debug hardware, install and configure the appropriate software:
For J-Link debugging: install J-Link software and properly set up its environment paths.
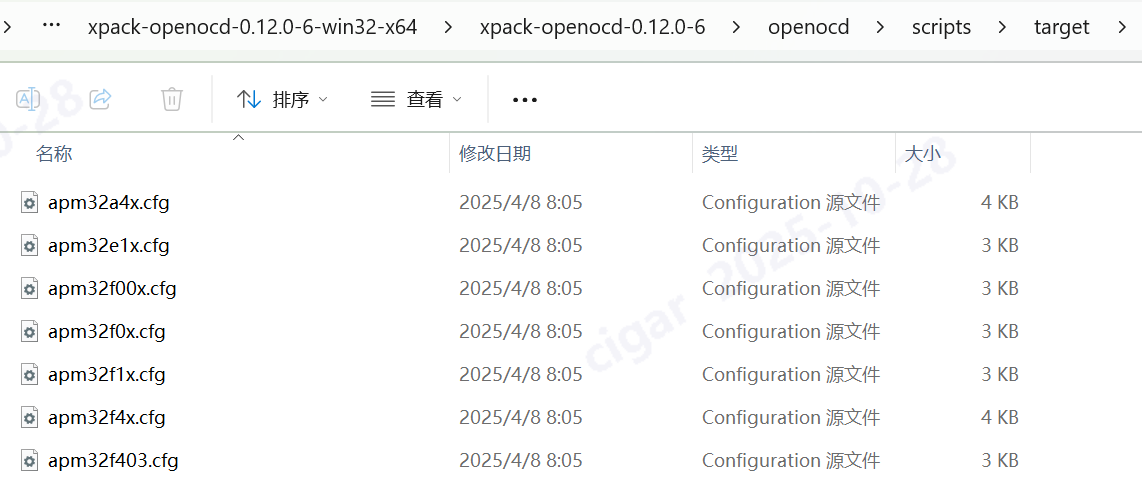
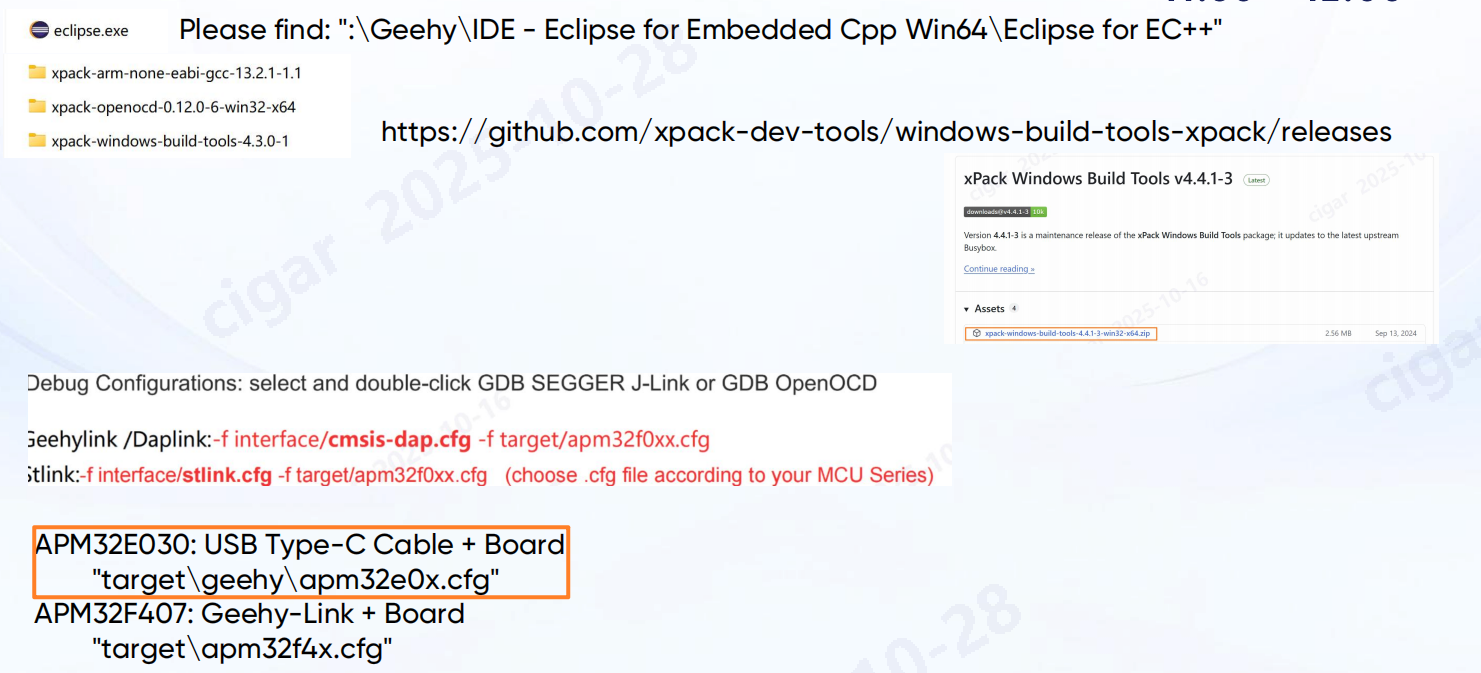
For other debuggers such as Geehy Link: install and configure OpenOCD.
Configure the Cortex-debug extension via its settings.json file.
- Carefully specify paths for GNU Arm Toolchain and OpenOCD.
- Refer to the Cortex-debug documentation for detailed instructions.
Note:
Geehy officially provides OpenOCD with various MCU-specific .cfg configuration file.
After following these steps, you can successfully use VS Code to compile, debug, and simulate your Geehy or ST MCU projects using the GCC toolchain.
You can find GNU style startup.s files and .ld files in Geehy SDKs. For example: