Story
For any technical questions, please visit our developer community. The Geehy technical team will be online to assist you.
01 Introduction
Typically, embedded development is done using an Integrated Development Environment (IDE). The advantage of an IDE is that it bundles tools like an editor, compiler, and debugger for a one-stop development experience. However, IDEs also have many disadvantages, such as not being cross-platform and often not being open-source. To break free from the constraints of an IDE, you need to write build rules manually, for example, by using Makefiles to construct a project. But Makefile syntax is relatively complex, and writing them by hand can be tedious and time-consuming.
CMake is a popular cross-platform build tool that can automatically generate Makefiles. [1] This article will primarily introduce how to use CMake and MinGW-w64 to build an APM32 project, using gcc-arm-none-eabi as the compiler and DAPLink as the debugger.
02 Environment Setup
Software Environment Preparation
- Windows 10/11
- CMake 3.28.0-rc5
- MinGW-w64 8.1.0
- gcc-arm-none-eabi 10.3.1
Setting up the MinGW-w64 Environment
Installing CMake
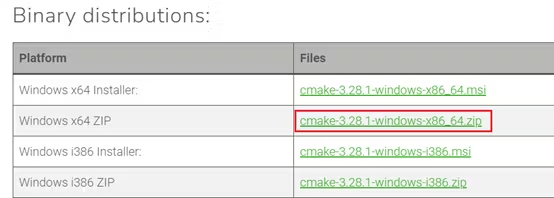
CMake is an open-source, cross-platform build tool that allows you to describe the installation (compilation process) for all platforms using simple statements. It can output various types of makefiles or project files. Go to the official website to find the binary version of CMake. This article uses cmake-3.28.0-rc5-windows-x86_64.zip.
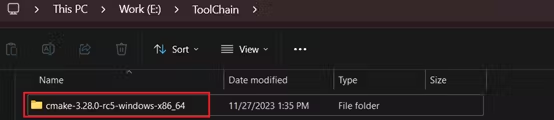
Download the ZIP archive and extract it to a location of your choice. Here, it is extracted to E:\ToolChain.
Configuring Environment Variables
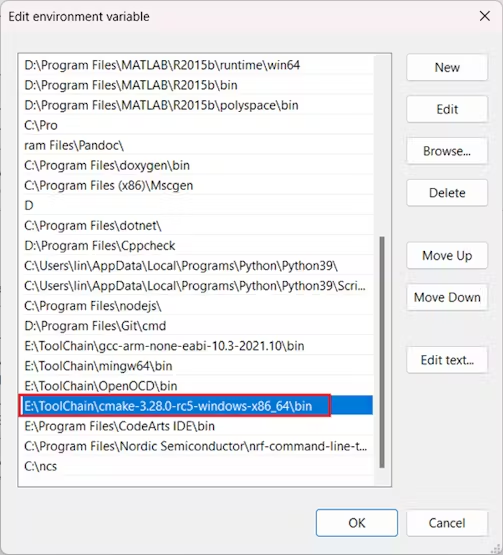
Add E:\ToolChain\cmake-3.28.0-rc5-windows-x86_64\bin to the system’s Path environment variable.
Verifying the CMake Installation
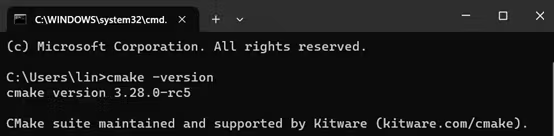
Open a Command Prompt (CMD) and type cmake -version. If you see information similar to the output below, it means CMake has been installed successfully.
Installing MinGW-w64
MinGW-W64, which stands for Minimalist GNU for Windows, is a toolset for compiling 32-bit and 64-bit applications on the Windows platform.
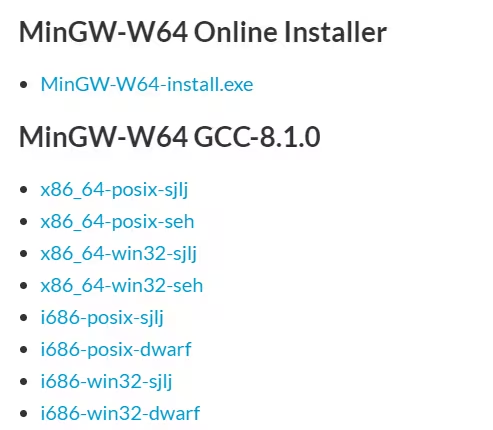
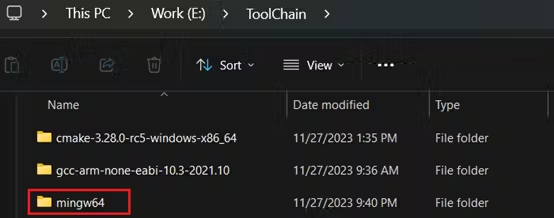
Download x86_64-win32-seh and extract the mingw64 folder from the ZIP archive to a location of your choice. Here, it is extracted to E:\ToolChain.
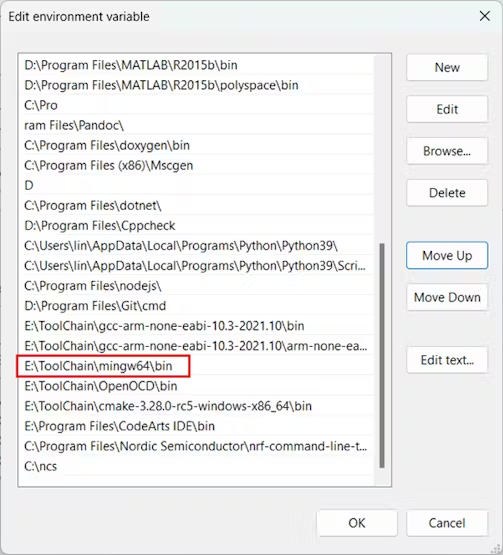
Configuring Environment Variables
Add E:\ToolChain\mingw64\bin to the system’s Path environment variable.
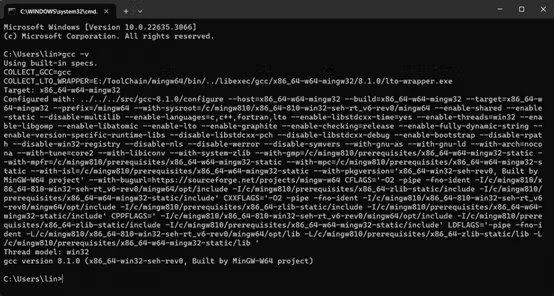
Verifying the MinGW-w64 Installation
Open a CMD and type gcc -v. If you see information similar to the output below, it means MinGW-w64 has been installed successfully.
Setting up the gcc-arm-none-eabi Environment
Installing gcc-arm-none-eabi
gcc-arm-none-eabi is a free compiler provided by ARM that supports multiple operating systems, including Windows, Linux, and macOS.
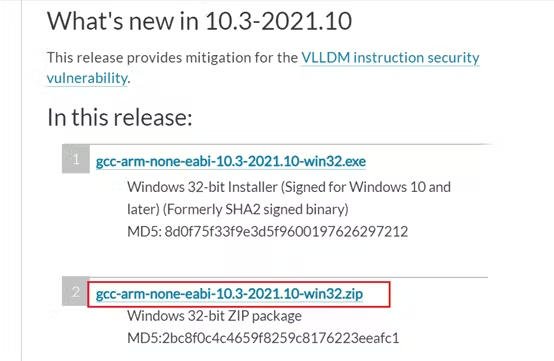
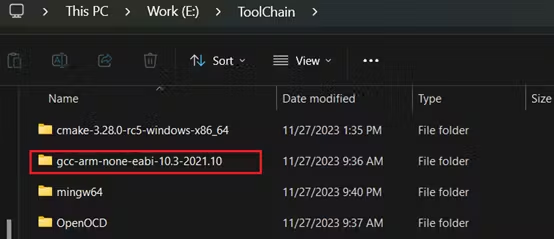
After downloading the ZIP archive from the link above, extract it to E:\ToolChain\ as well.
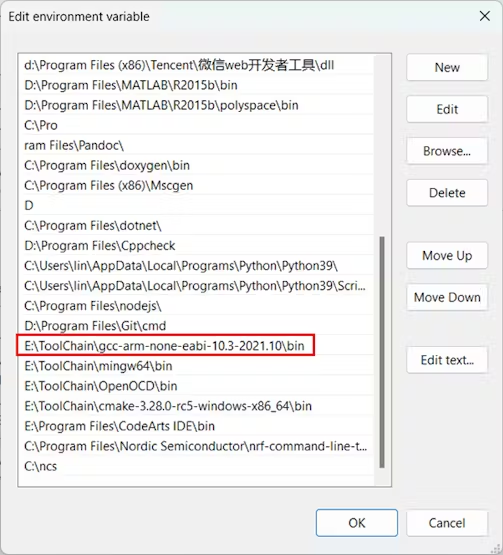
Configuring Environment Variables
Add E:\ToolChain\gcc-arm-none-eabi-10.3-2021.10\bin to the system’s Path environment variable.
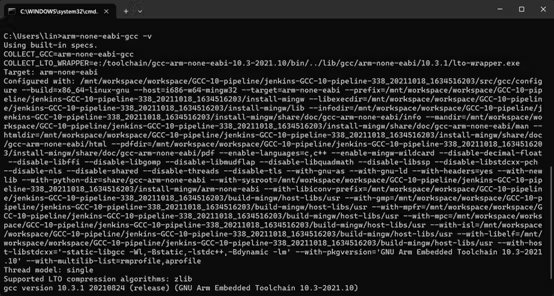
Verifying the gcc-arm-none-eabi Installation
Open a CMD and type arm-none-eabi-gcc -v. If you see information similar to the output below, it means gcc-arm-none-eabi has been installed successfully.
03 Building the Project
Preparing the APM32 Project
Download the APM32_DAL_SDK_V1.3.0 from the APM32 DAL SDK page. For this guide, we will use the GPIO_Toggle project for our build.
Writing CMakeLists.txt
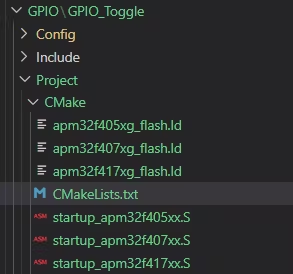
Navigate to the GPIO_Toggle -> Project directory, create a new directory named CMake, and add a CMakeLists.txt file inside it, as shown in the image below.
For CMake syntax, you can refer to the CMake Documentation and Community. Here, we will only cover some common and critical syntax.
Specify Minimum CMake Version and Project Name
cmake_minimum_required is used to specify the minimum version of CMake required to build this project. project is used to specify the project name.
cmake_minimum_required(VERSION 3.21) # Specify the minimum CMake version required for this project
project(GPIO_Toggle C CXX ASM) # Specify the project name and programming languages
Specify the Compiler
set is used to define variables. CMAKE_C_COMPILER specifies the C compiler, CMAKE_CXX_COMPILER specifies the C++ compiler, and CMAKE_ASM_COMPILER specifies the assembly language compiler.
CMAKE_OBJCOPY specifies the tool for generating binary files, and SIZE specifies the tool for generating size reports.
set(CMAKE_C_COMPILER "arm-none-eabi-gcc") # Specify the C compiler
set(CMAKE_ASM_COMPILER "arm-none-eabi-gcc") # Specify the assembly language compiler
set(CMAKE_OBJCOPY arm-none-eabi-objcopy) # Specify the tool for generating binary files
set(SIZE arm-none-eabi-size) # Specify the tool for generating size reports
Configure Device ID
set is used to define variables. DEVICE_ID specifies the device ID, BSP_DEFINE specifies the BSP macro definition, and BSP_DIR_NAME specifies the BSP directory name.
# device settings
set(DEVICE_ID "APM32F407xx")
set(BSP_DEFINE BOARD_APM32F407_MINI)
set(BSP_DIR_NAME Board_APM32F407_Mini)
# select startup file
if ("${DEVICE_ID}" STREQUAL "APM32F405xx")
set(STARTUP_FILE startup_apm32f405xx.S)
set(LINKER_FILE apm32f405xg_flash.ld)
set(DEVICE_DEFINE APM32F405xx)
elseif ("${DEVICE_ID}" STREQUAL "APM32F407xx")
set(STARTUP_FILE startup_apm32f407xx.S)
set(LINKER_FILE apm32f407xg_flash.ld)
set(DEVICE_DEFINE APM32F407xx)
elseif ("${DEVICE_ID}" STREQUAL "APM32F417xx")
set(STARTUP_FILE startup_apm32f417xx.S)
set(LINKER_FILE apm32f417xg_flash.ld)
set(DEVICE_DEFINE APM32F417xx)
else()
message(FATAL_ERROR "Please select first the target APM32F4xx device")
endif ()
Add Compile Options
add_compile_options is used to add compilation flags. -mcpu=cortex-m4 specifies the CPU architecture, -mthumb specifies the Thumb instruction set, and -mthumb-interwork ensures compatibility between Thumb and ARM instruction sets.
add_compile_options(-mcpu=cortex-m4 -mthumb -mthumb-interwork)
add_compile_options(-ffunction-sections -fdata-sections -fno-common -fmessage-length=0)
Configure Macro Definitions
add_definitions is used to add preprocessor macro definitions. -D${DEVICE_DEFINE} specifies the device macro, -D${BSP_DEFINE} specifies the BSP macro, and -DUSE_DAL_DRIVER indicates that the DAL library should be used.
add_definitions(
-DUSE_DAL_DRIVER
-D${DEVICE_DEFINE}
-D${BSP_DEFINE}
)
Add Header and Source File Paths
include_directories is used to add header file paths. file(GLOB_RECURSE SOURCES) is used to gather source files.
# add include file
include_directories(
../../Include
../../Config/Include
../../../../../../Libraries/CMSIS/Include
../../../../../../Libraries/Device/Geehy/APM32F4xx/Include
../../../../../../Libraries/APM32F4xx_DAL_Driver/Include
../../../../../../Boards/${BSP_DIR_NAME}/Include
)
# add source file
file(GLOB_RECURSE SOURCES
"${STARTUP_FILE}"
"../../Source/*.c"
"../../Config/Source/*.c"
"../../../../../../Libraries/APM32F4xx_DAL_Driver/Source/*.c"
"../../../../../../Boards/${BSP_DIR_NAME}/Source/*.c"
)
Note:
The GCC compiler can output static libraries, dynamic libraries, and executables. In theory, all source files could be compiled together. However, this would mean recompiling every file on each build, leading to long compilation times. Therefore, it’s common practice to separate source files into multiple libraries and then link them together to reduce build times. This is where
add_library
becomes useful. For instance, you could compile the LwIP library into a static library and link it to the main program.
add_library(lwip
../../../../../../Middlewares/lwip-2.1.2/src/api/api_lib.c
...
)
Add Linker Script
add_link_options is used to add linker options, including the linker script.
set(LINKER_SCRIPT ${CMAKE_SOURCE_DIR}/${LINKER_FILE})
add_link_options(-T ${LINKER_SCRIPT})
Add Linker Options
- -Wl,-gc-sections: A linker option to remove unused code and data sections, which helps reduce the final binary size.
- –print-memory-usage: A linker option to print memory usage details after the linking process.
- -Map=${PROJECT_BINARY_DIR}/firmware.map: A linker option to generate a map file, which contains detailed information about the linking process, such as the memory addresses of functions and variables.
add_link_options(-Wl,-gc-sections,--print-memory-usage,-Map=${PROJECT_BINARY_DIR}/firmware.map)
add_link_options(-mcpu=cortex-m4 -mthumb -mthumb-interwork)
Add Executable
add_executable is used to create an executable file. ${SOURCES} specifies the source files, and ${LINKER_SCRIPT} specifies the linker script.
add_executable(firmware.elf ${SOURCES} ${LINKER_SCRIPT})
Add Commands to Generate Binary Files
add_custom_command is used to add custom commands. TARGET firmware.elf POST_BUILD specifies that the commands should be executed after the executable is built. The COMMAND lines use objcopy to generate HEX and BIN files from the ELF output.
set(HEX_FILE ${PROJECT_BINARY_DIR}/firmware.hex)
set(BIN_FILE ${PROJECT_BINARY_DIR}/firmware.bin)
add_custom_command(TARGET firmware.elf POST_BUILD
COMMAND ${CMAKE_OBJCOPY} -Oihex $<TARGET_FILE:firmware.elf> ${HEX_FILE}
COMMAND ${CMAKE_OBJCOPY} -Obinary $<TARGET_FILE:firmware.elf> ${BIN_FILE}
COMMENT "Building ${HEX_FILE}\nBuilding ${BIN_FILE}")
Compiling the Project
Generate Makefiles
Use the following commands to generate the Makefiles.
$ cd .\Project\CMake
$ mkdir cmake-build
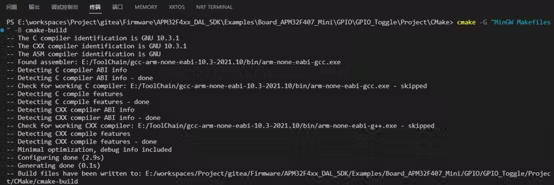
$ cmake -G "MinGW Makefiles" -B cmake-build
This creates a cmake-build directory to store the generated Makefiles and then runs CMake to generate them.

Note: You can use cmake -DCMAKE_BUILD_TYPE=Debug -B cmake-build to specify a Debug build type.
Generate the Executable
Use the following commands to compile the project.
$ cd .\Project\CMake\cmake-build
$ make (or mingw32-make)
After compilation is complete, firmware.elf, firmware.hex, and firmware.bin files will be generated in the cmake-build directory.

Note: Use make clean to remove the files generated during compilation.
Note: Use make -j for multi-threaded compilation. You can specify the number of threads, for example, make -j4 will use 4 threads for compilation.
At this point, you have successfully built an APM32 project with CMake and produced an executable file. You can now proceed to use tools like OpenOCD or PyOCD with a DAPLink to flash and debug the device.