1. Introduction
During MCU development, even with a properly configured development environment (Keil, J-Link drivers, and device packs correctly installed) where programming and execution were previously successful, issues can arise after modifying hardware or code. You might encounter problems such as the J-Link debugger not being recognized, the device being recognized but failing to program, or the device programming successfully but the application failing to run.
This document summarizes common causes for these issues and their corresponding solutions. While these cover fundamental scenarios, real-world applications can present a wide variety of unique problems, so this list is not exhaustive.
2. Your board fails to recognize J-Link, while other boards work fine
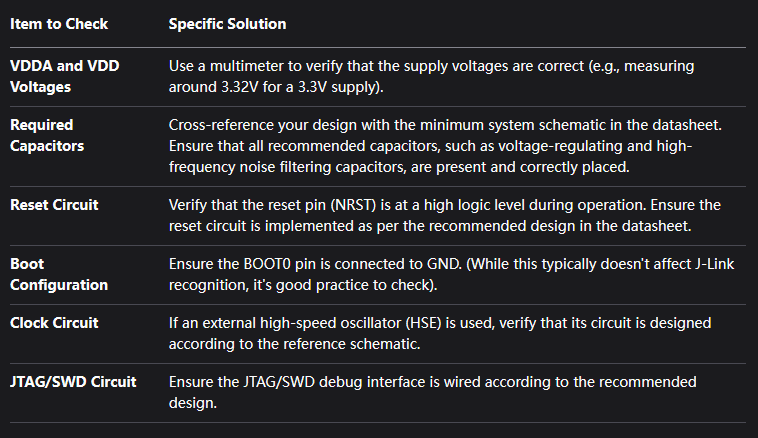
2.1 Check if the MCU’s minimum system is functioning correctly
2.2 Check the connection between the J-Link’s reset pin and the MCU’s NRST pin
When initiating a connection or programming in Keil, the JTAG interface generates a reset signal. This signal is crucial if the MCU immediately enters a low-power mode or reconfigures the debug pins to GPIOs upon power-up. The reset allows the J-Link to halt the CPU and establish a debug connection before the application code executes.
If the JTAG’s reset pin is not connected to the MCU’s NRST pin and the aforementioned code is running, you can manually press the reset button and then immediately attempt to erase the Flash contents. After the Flash is erased, the J-Link should be recognizable.
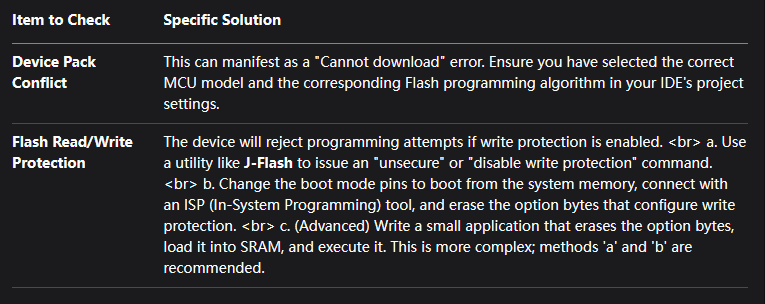
3. J-Link is recognized, but programming fails
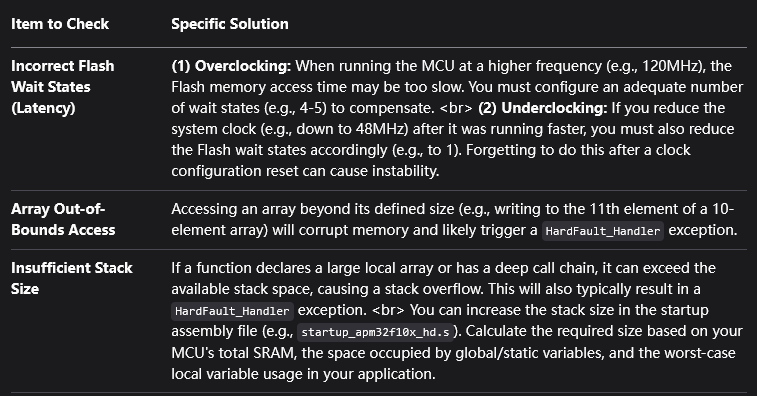
4. Programming is successful, but the application does not run correctly afterward