Recently, a customer faced difficulties compiling an APM32F0xx SDK-based project after copying and renaming a template project.
In this blog, I would like to walk you through the problem and the detailed solution we applied, hoping to assist others dealing with similar issues.
The Problem:
The customer followed recommended steps:
Copied a template project from Geehy’s APM32F0xx_SDK and renamed it to TesteTemplateAPM32F.
Saved the project in the root directory of the SDK. Copied essential like “.cproject” & “.ld” format files, Include, and Source into the SDK root.–The relative position of the project and linked documents were changed here
Revised all linked resource paths within Eclipse to point to the new project structure.
Despite these efforts, the project failed to compile. The error logs indicated missing header files, such as:
fatal error: apm32f0xx_int.h: No such file or directory

This suggested that the compiler could not locate necessary include directories (inc folders).
Diagnosis: Understanding Eclipse Linker and Include Paths
This type of issue is common when creating or renaming Eclipse projects because:
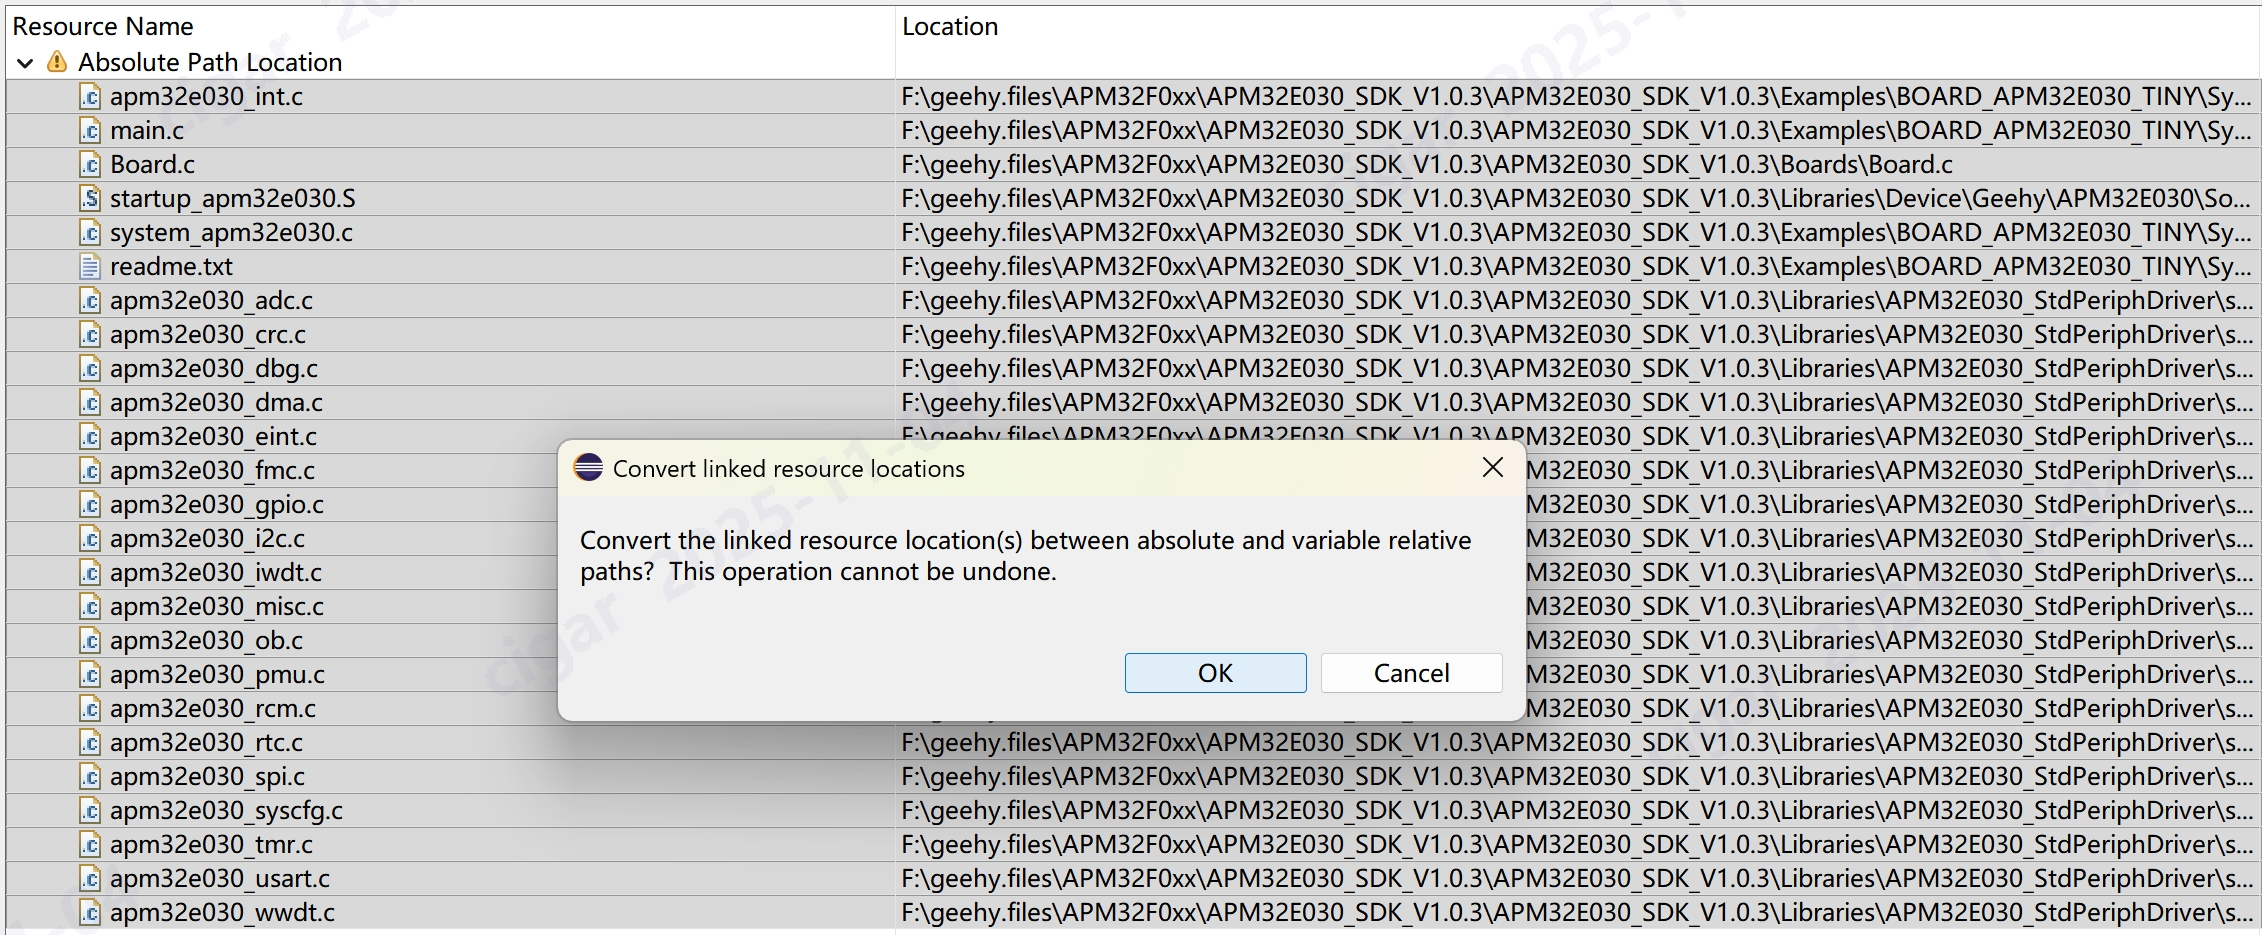
- Eclipse generates absolute paths for linked resources.
- If the relative positions of folders (e.g., Libraries, Include) change, the absolute paths become invalid.
- The build system cannot locate critical header files, resulting in compilation errors.
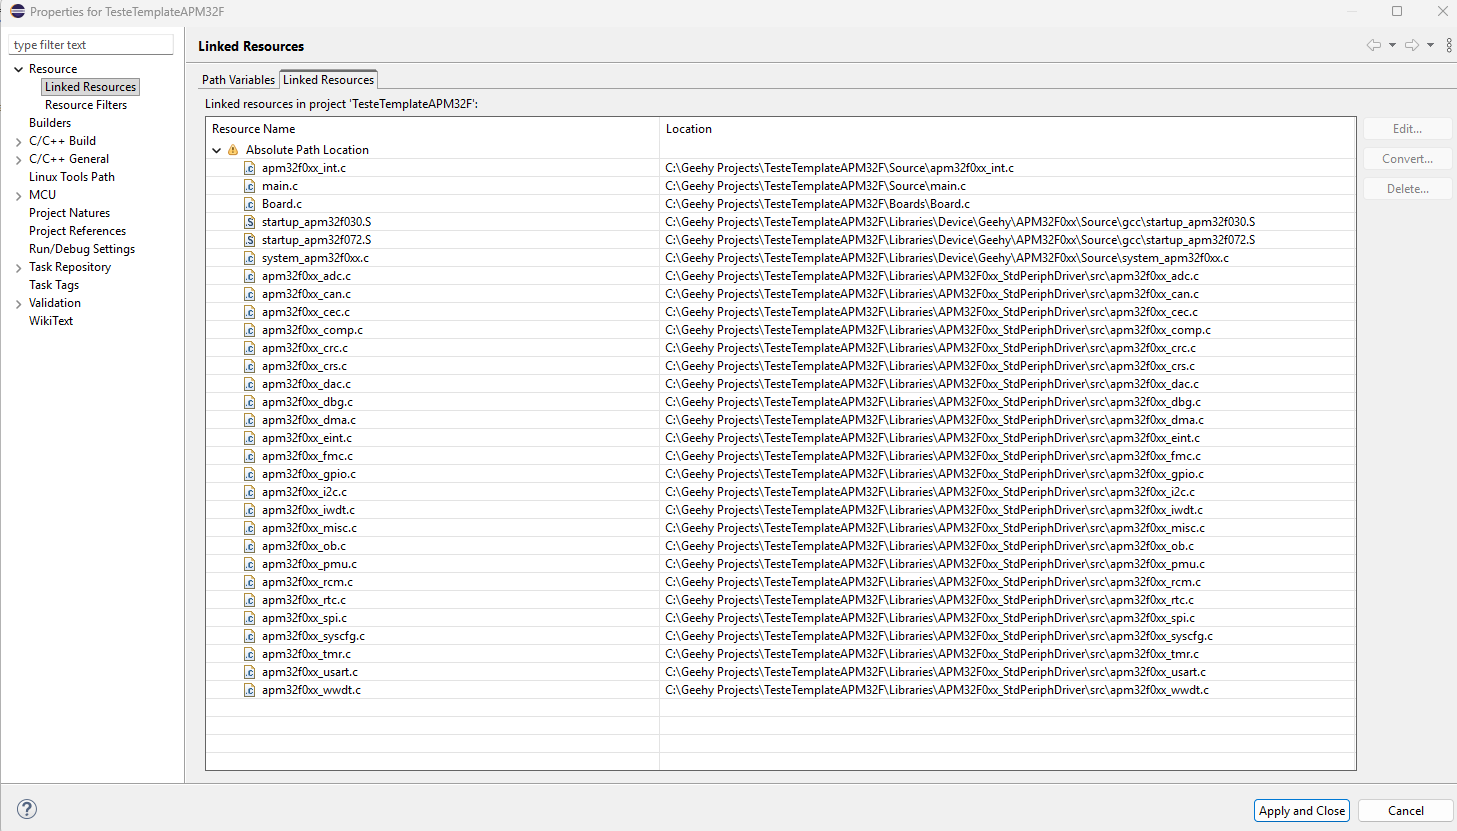
To illustrate, I examined a working Eclipse project named “SysTick” from the same SDK:
The project has properly configured toolchain paths.

Linked Resources use absolute paths(you can convert at any time), but the relative organization of folders remains consistent.
The project compiles successfully, generating .elf and .hex files without errors.
The Key Fix: Correcting Include Paths
The major root cause in the user’s setup was incorrect or missing include directory settings.
While the source code paths were updated, the header file paths (inc folders) were not correctly linked.
Where to Check and Fix
In Eclipse, navigate to:
Properties -> C/C++ General -> Paths and Symbols -> Includes -> GNU C
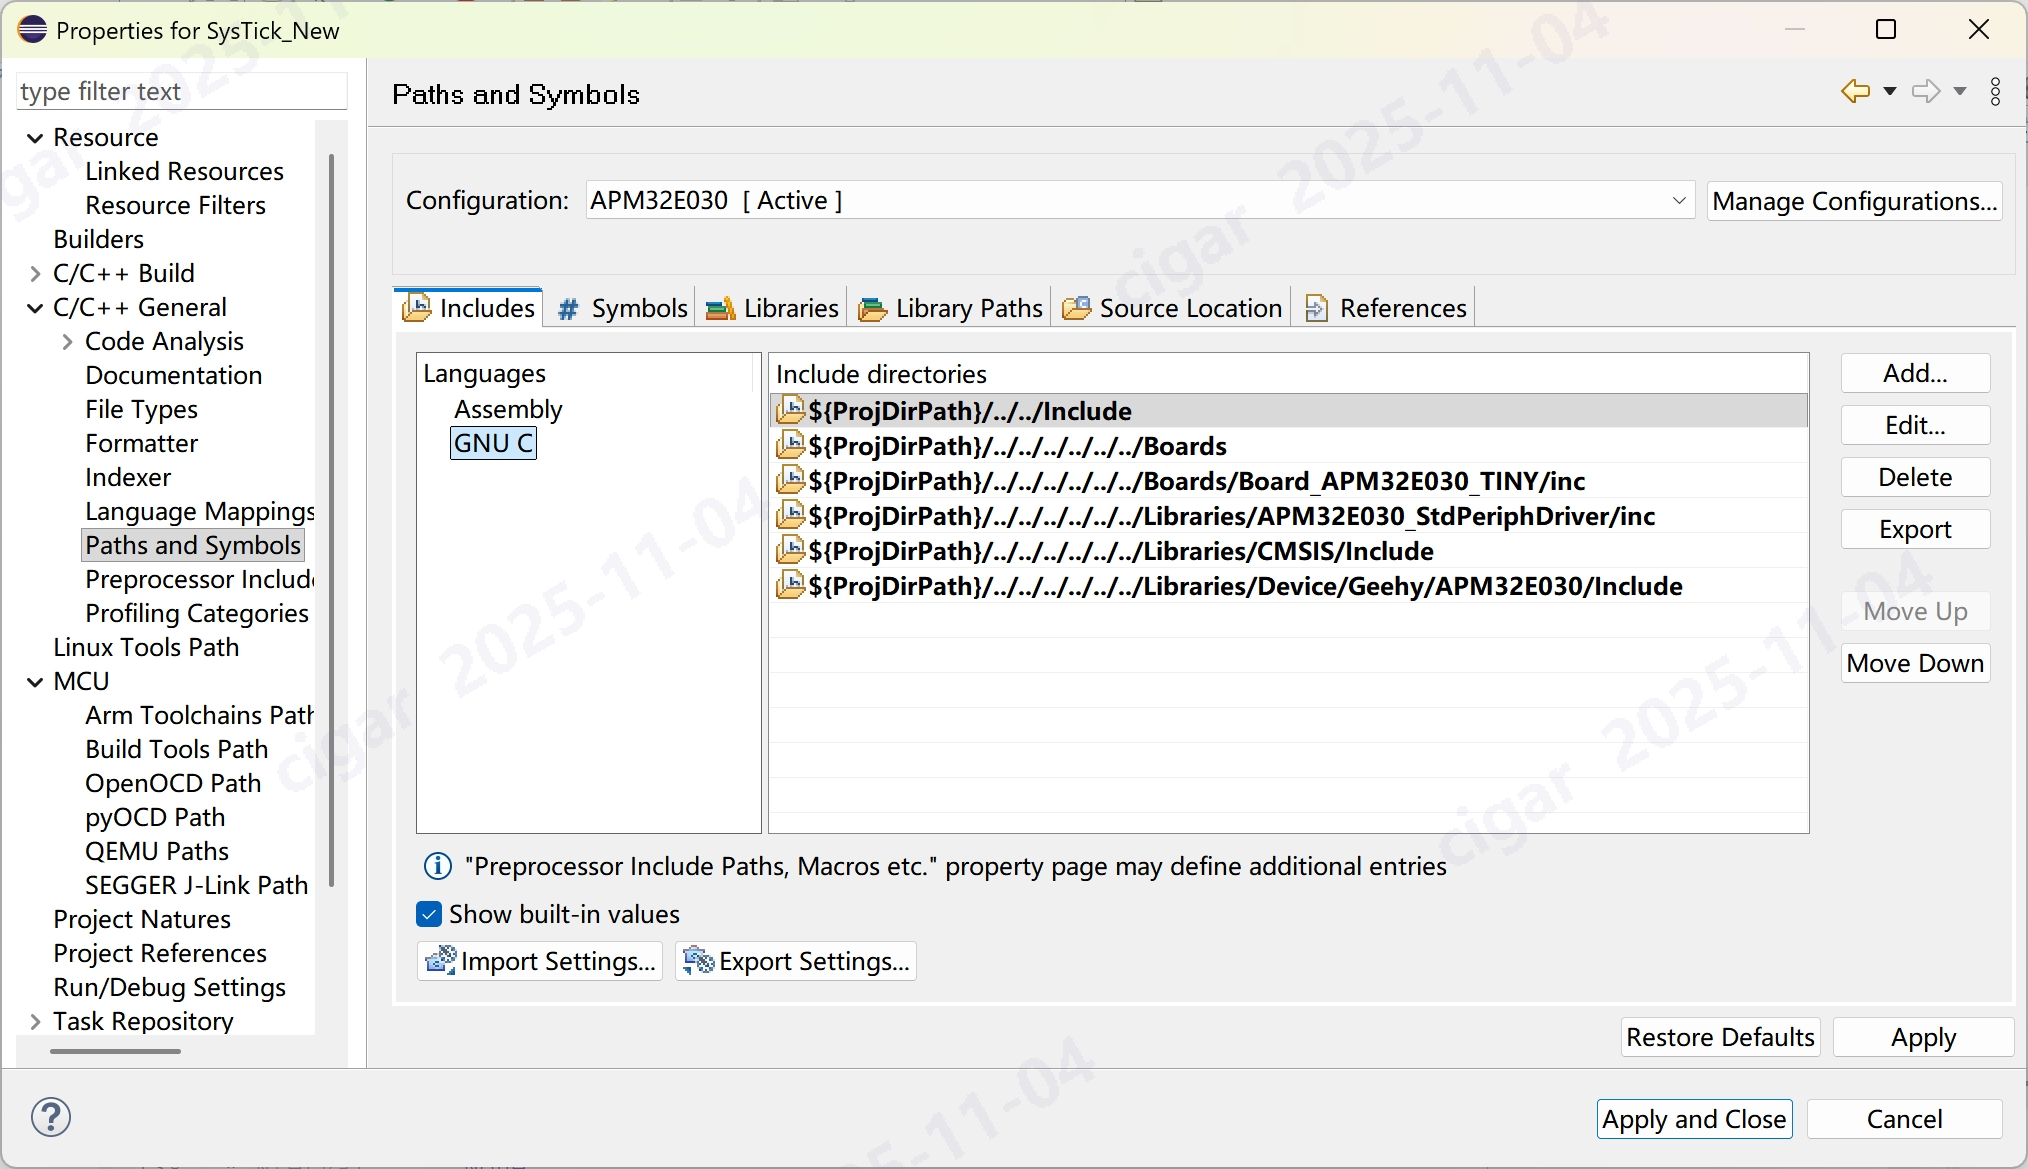
Here, ensure all the necessary include directories exist and are correctly referenced. For the user’s project, the includes should resemble differently:
${ProjDirPath}/Include
${ProjDirPath}/Boards
${ProjDirPath}/Boards/Board_APM32F030_MINI/inc
${ProjDirPath}/Libraries/APM32F0xx_StdPeriphDriver/inc
${ProjDirPath}/Libraries/CMSIS/Include
${ProjDirPath}/Libraries/Device/Geehy/APM32F0xx/Include
Additionally, verify that the macros defined under:
Paths and Symbols -> Symbols
are properly configured, as they may affect conditional compilation.
Restoring Missing Paths
${ProjDirPath}/../../Include
Removing this led to the missing header file error during compilation.
By adding this path back:
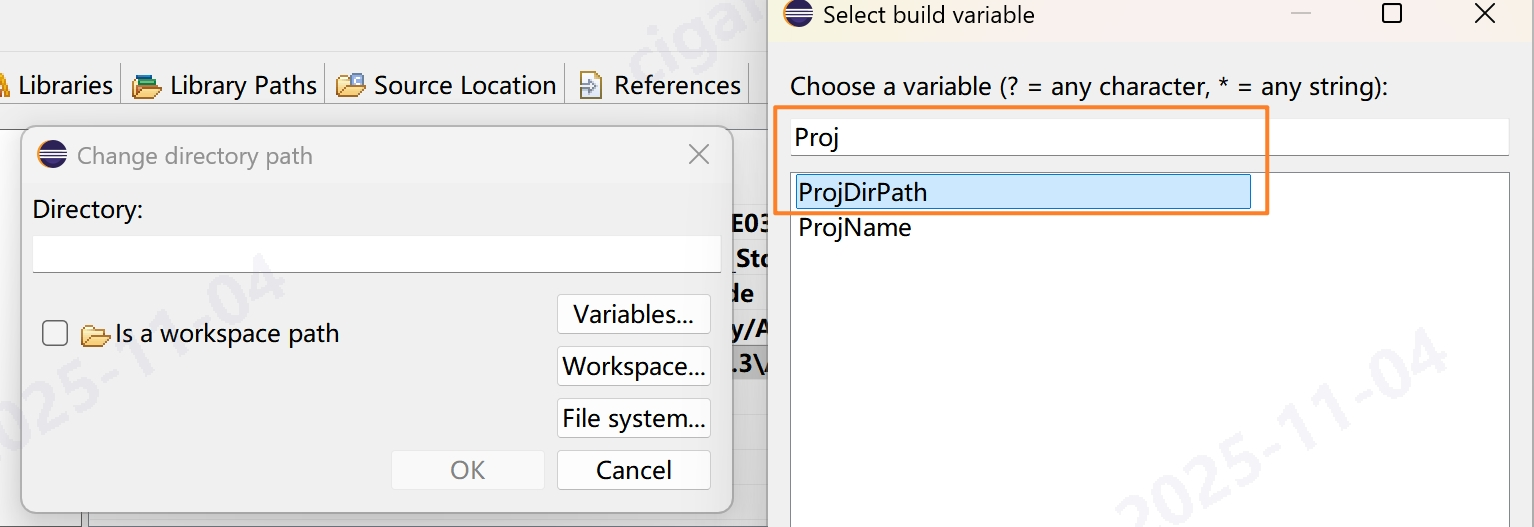
Go to “Add…” -> “Variables” -> select ProjDirPath, and append /../../Include
Confirm the directory exists relative to project directory
The compilation errors disappeared, and the build succeeded again.
Summary and Recommendations
- Always maintain the relative folder structure when copying or renaming projects.
- After copying, double-check all include paths in Paths and Symbols — missing or incorrect include directories lead to header file errors.
- Remember Eclipse uses absolute paths in linked resources — altering folder positions without updating these paths breaks the build.
- If compilation fails with “No such file or directory,” verify that all necessary header include paths are present and correctly set.
- With these checks and adjustments, Ademir’s project compiled successfully. I hope this case study provides clear insights and helps you troubleshoot similar issues efficiently in Eclipse IDE.
If you encounter any difficulties, feel free to reach out — we’re here to help you get your embedded projects up and running smoothly!
After the successful build, you might need to debug on Eclipse IDE with CMSIS-DAP Links (such as Geehy Link), J-Link or ST-Link.
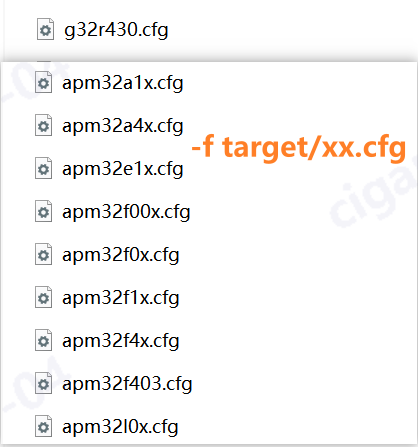
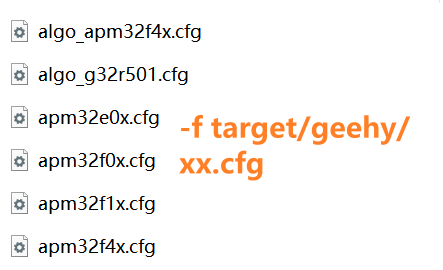
Geehy offers an OpenOCD with APM32/G32 devices configured.
You can simply type down commands in “Debug Configurations” to make it happen.
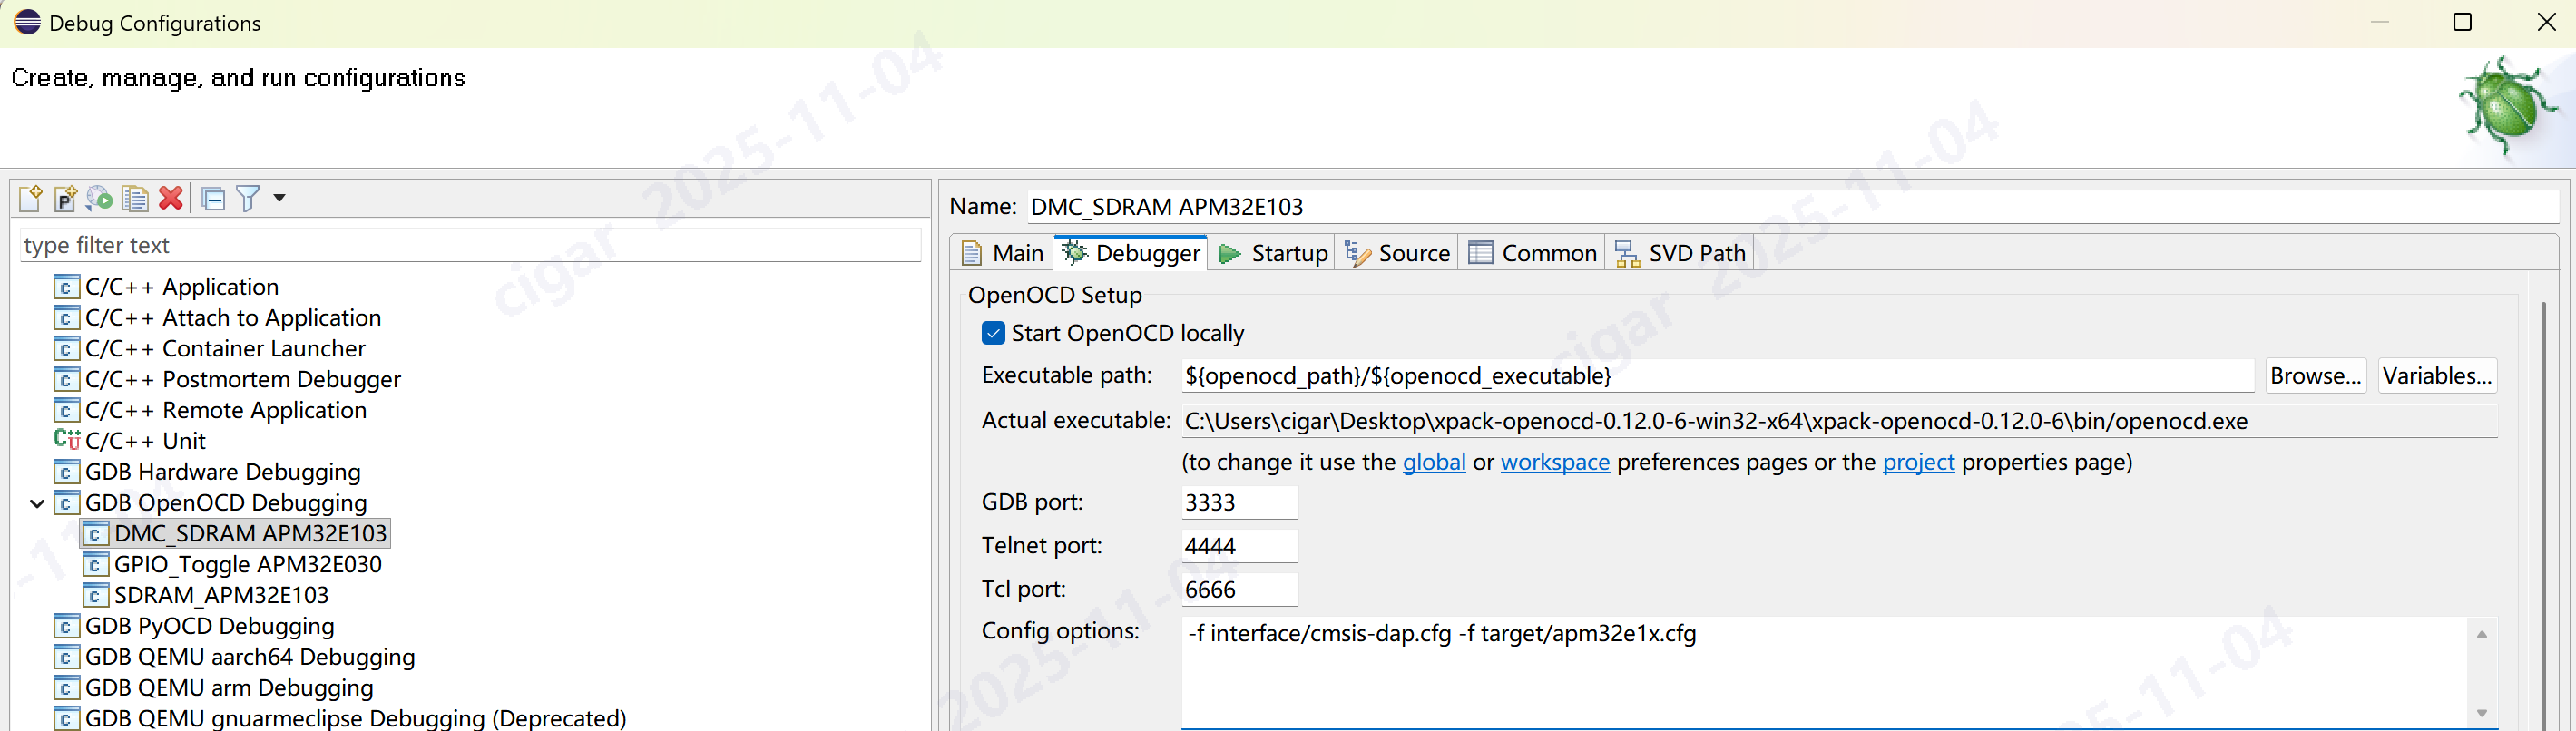
Once you double-click the GDB OpenOCD Debugging menu and Debugger page, type commands like:
-f interface/stlink.cfg -f target/apm32e1x.cfg
-f interface/cmsis-dap.cfg -f target/geehy/apm32e0x.cfg
-f interface/cmsis-dap.cfg -f target/apm32e1x.cfg
For interface, the options are: cmsis-dap.cfg, jlink.cfg, and stlink.cfg
For target, please find your Geehy MCU in the directory “xpack-openocd-0.12.0-6-win32-x64\xpack-openocd-0.12.0-6\openocd\scripts\target”